How to Design a Shoe: The Complete Process from Sketch to Sample
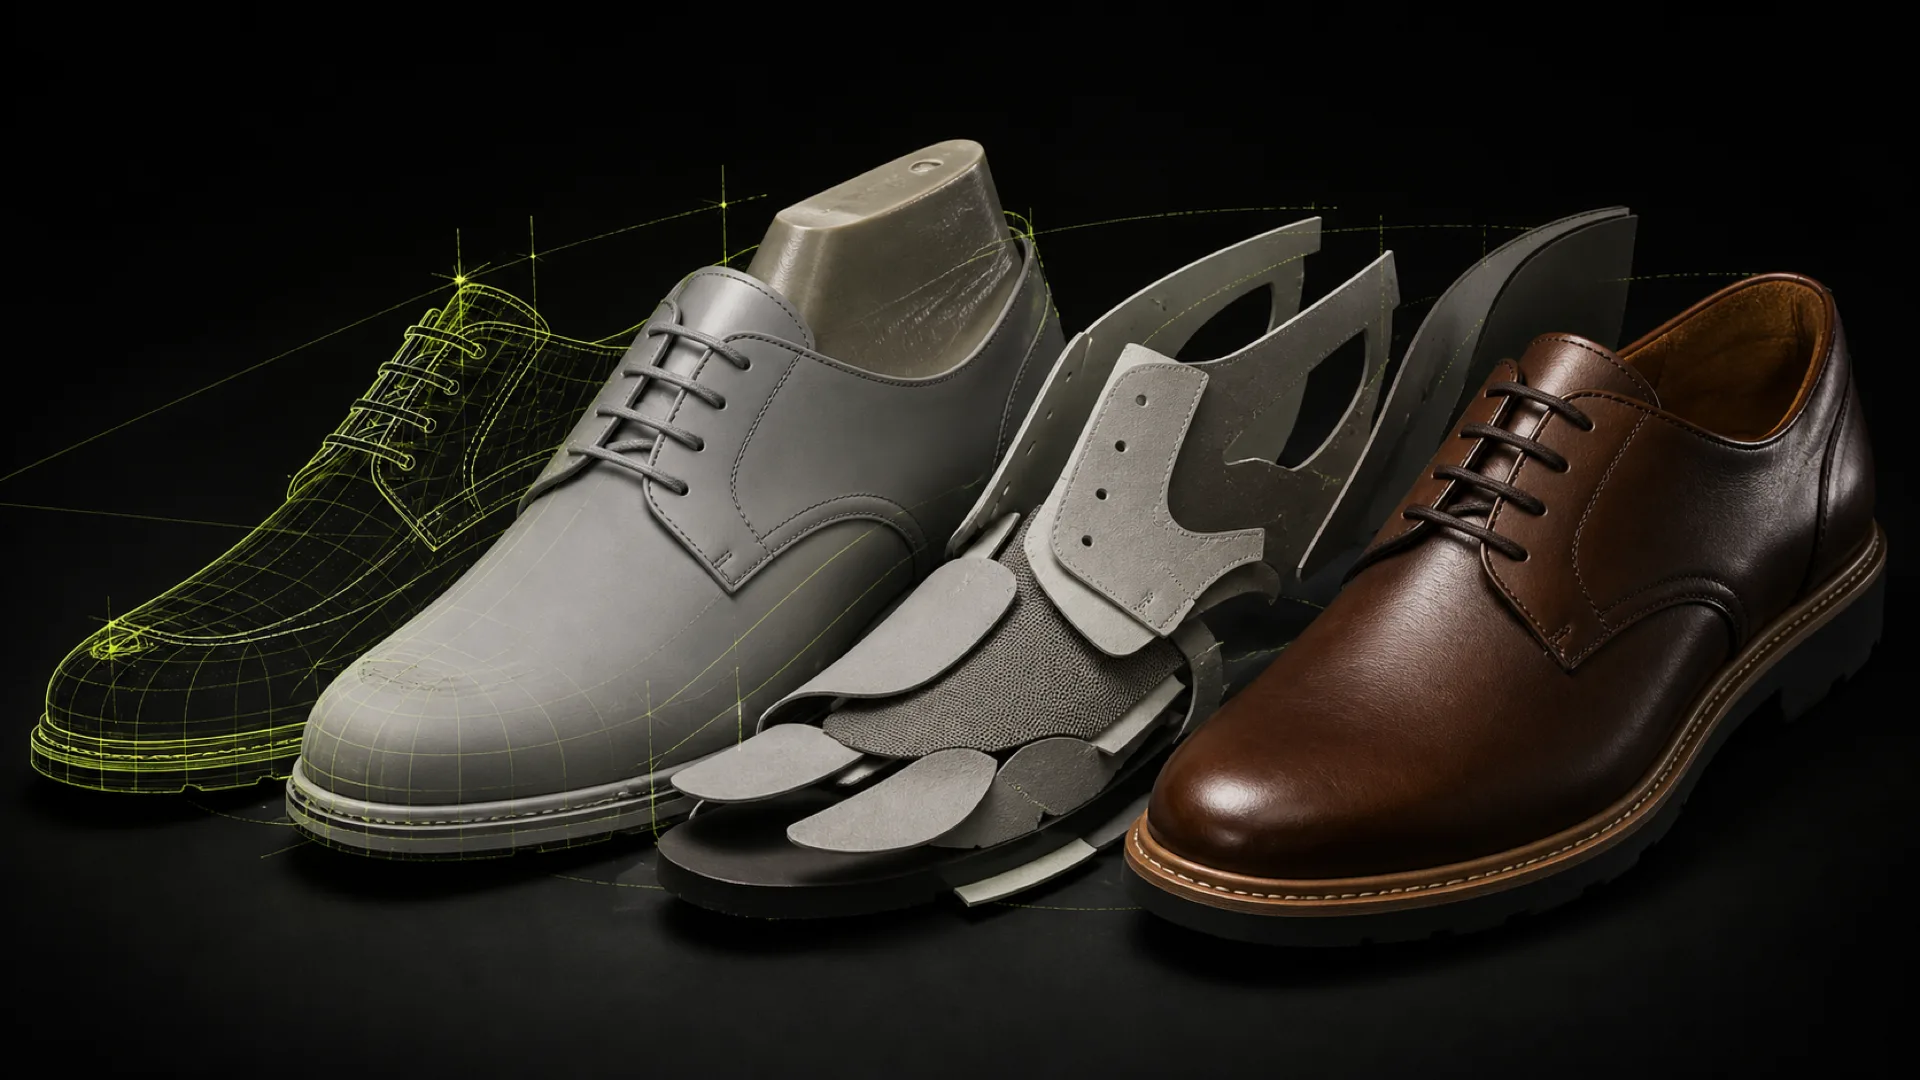
Most guides on designing a shoe teach you to draw one. That is the first ten per cent. The other ninety is what turns a drawing into an object a factory can build — and it is where nearly every first attempt collapses.
The footwear industry produces roughly 14 billion pairs a year, and finalising a single design takes an average of 13 physical samples (The Interline, January 2025, citing DUO Design Studio / Colorado State University). Those thirteen rounds exist because decisions get made in the wrong order. This is the order they should be made in.
Key Takeaways
- Shoe design is a development sequence, not a drawing exercise. The drawing is step three of eight.
- The last is chosen before the design is finalised — it dictates fit and silhouette, and everything downstream inherits it.
- The pattern is engineered from the last's 3D surface, then flattened into cuttable pieces. This is the step that decides whether a design is buildable.
- The tech pack, not the sketch, is what a factory actually works from.
- Fit review happens on a physical sample in the base size; grading to the full size run comes last, never first.
How Do You Design a Shoe? The Short Answer
Designing a shoe means running eight steps in sequence: define the brief, select the last, develop the design, engineer the pattern, build the tech pack, produce a sample, review fit and construction, then grade to the full size run.
The order is not stylistic preference. Each step consumes decisions made in the one before it, and skipping ahead is what produces samples that look right and fit wrong. A designer who draws before choosing a last has designed for a shape that may not exist.
Step 1 — Define the Brief Before You Draw
The brief sets the constraints that make every later decision answerable. Without it, "is this right?" has no meaning.
A workable footwear brief fixes at least these:
- Category and construction — trainer, derby, ankle boot, sandal; cemented, Goodyear welted, vulcanised, injected. Construction determines what the upper must allow for.
- Target price and cost ceiling — this decides material grade, piece count and number of operations. A twelve-piece upper is not a budget upper.
- Season and use case — indoor, outdoor, formal, performance. Drives lining, sole and material choices.
- Size range and fit standard — which last family, which base size, which width fittings.
- Volume — a fifty-pair capsule and a twenty-thousand-pair production run tolerate completely different levels of complexity.
The brief is also where the honest cost conversation happens. Piece count, stitching complexity and material yield are the three levers that move landed cost most, and all three are decided by the designer whether or not they realise it.
Step 2 — Choose the Last
The last is the three-dimensional form the shoe is built around, and it is the single most consequential choice in the process. It sets internal volume, and therefore fit; it sets silhouette; and it becomes the surface the pattern is derived from.
Choosing it before the design is finalised feels counterintuitive to people coming from apparel or graphics, but it is the correct order. Two identical uppers on different lasts are different products. A heel height cannot be changed later by adding to the sole, because the last carries the pitch, the toe spring and the heel seat angle.
In practice the choice is: pull from an existing house last library, modify an existing last, or develop a new one. New lasts are expensive and slow, so most development starts from a library shape. If you are unclear on what a last actually is and how its geometry works, what is a shoe last covers the anatomy and terminology this step depends on.
Step 3 — Develop the Design
Now the drawing. Footwear design happens across three representations, and professional development uses all three.
Flat technical sketches. Side, top, front, back and sole views, drawn to proportion with construction lines marked. This is documentation, not illustration — it is the drawing the pattern engineer reads. Adobe Illustrator is the industry standard here.
Presentation renders. Material, colour and finish shown convincingly for internal or buyer sign-off. Increasingly this comes off the 3D model rather than being drawn.
The 3D model on the last. The design built as geometry on the actual last surface, which is where design and engineering stop being separate activities. Construction lines drawn in 3D are already the beginning of the pattern.
The discipline that separates a professional sketch from a student one is drawing on the last's real profile rather than an invented outline. A design drawn on a silhouette that no last matches cannot be built without being redrawn.
Step 4 — Engineer the Pattern
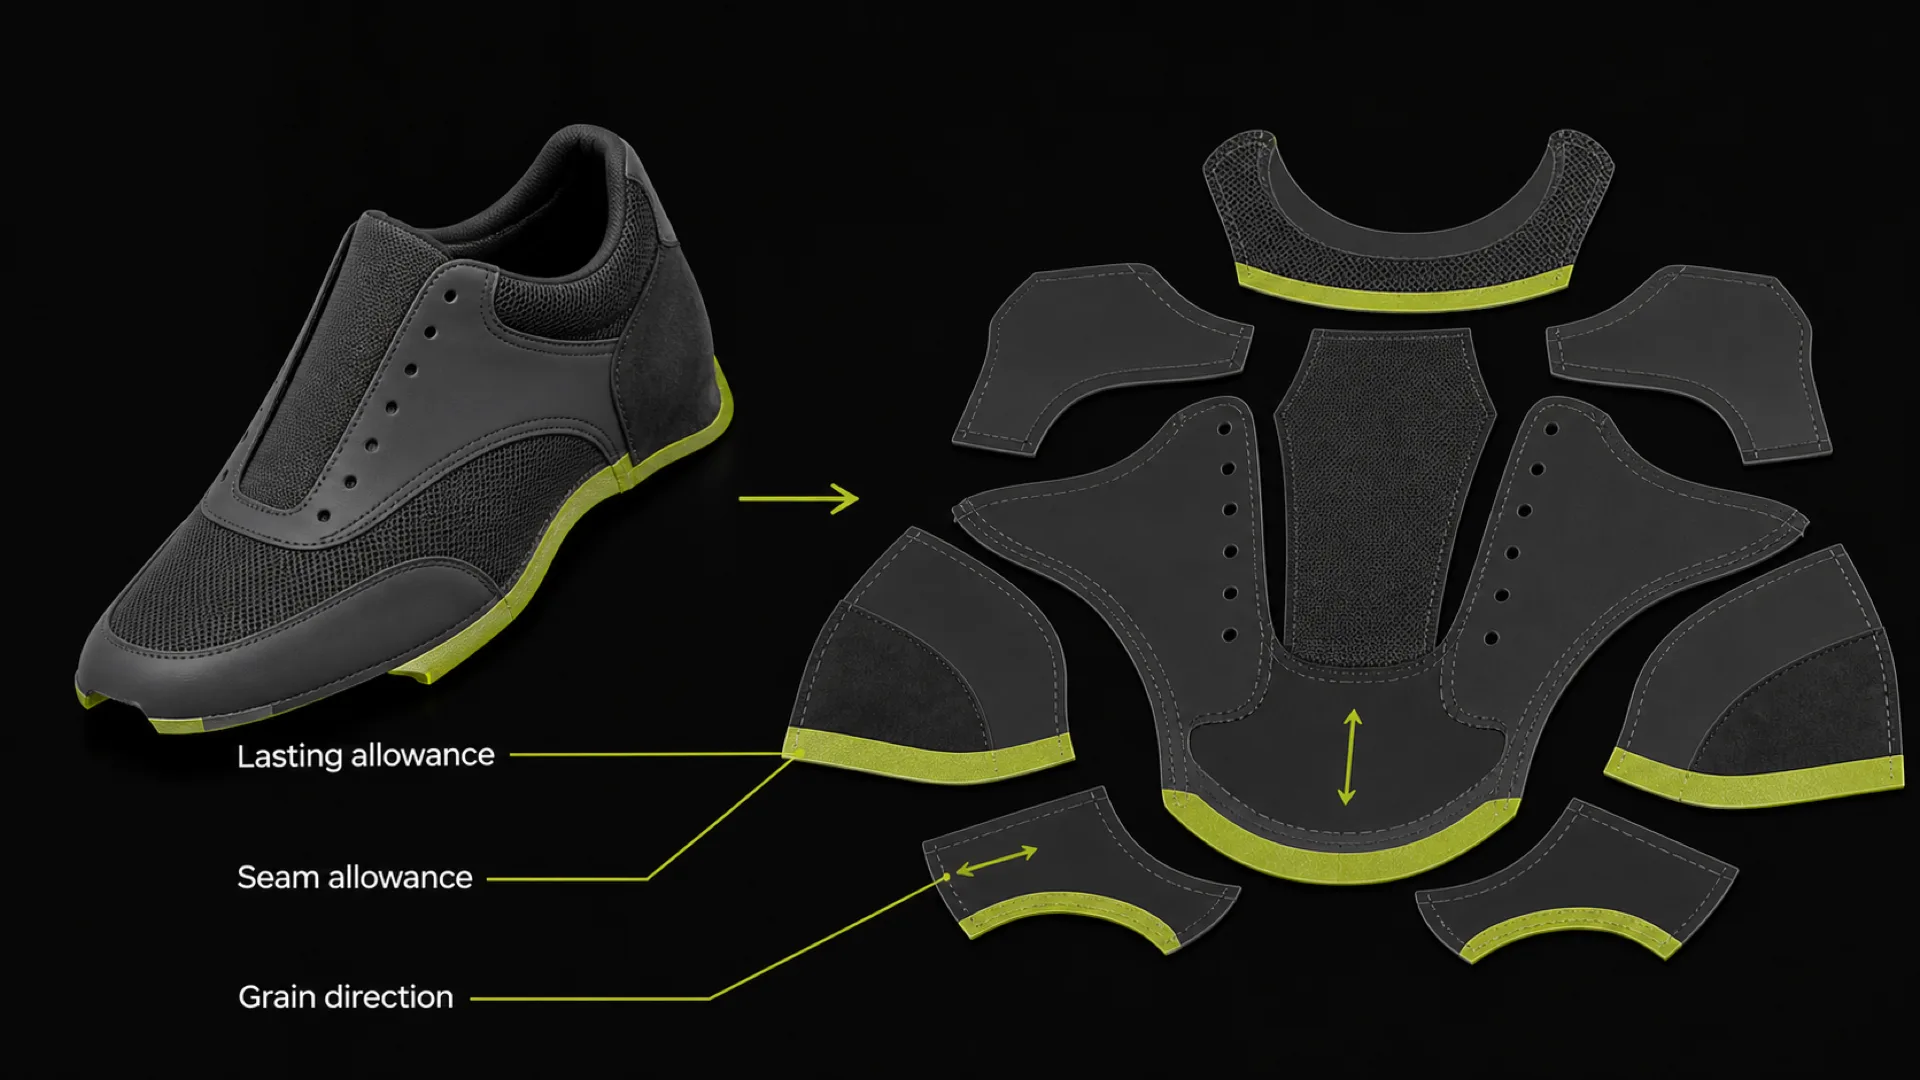
This is the step that decides whether the design is a shoe or a picture, and it is the step almost every "how to design a shoe" guide omits.
Pattern engineering takes the design as drawn on the last and produces the flat pieces that will be cut. It involves:
- Placing construction lines on the 3D surface — seams, panel boundaries, overlaps, and where each piece begins and ends.
- Flattening the 3D surface into 2D pieces. A curved surface cannot be laid flat without distortion, so flattening distributes that distortion where the material and the construction can absorb it. This is the 3D-to-2D flattening step, and it has to respect lasting allowance, grain direction and seam placement.
- Adding allowances — lasting margin, seam allowance, folding allowance, reinforcement positions.
- Splitting into upper, lining and reinforcement layers, each with its own geometry.
Get flattening wrong and the upper will not close cleanly over the last. The symptom is a sample that puckers, gaps at the seams, or pulls the design line out of position — and no amount of adjustment at the bench fixes a pattern that was wrong on the screen.
Footwear-specialised CAD does this natively, because the whole tool is organised around it: design in 3D on the last, and the flat pattern updates in real time. Generalist 3D software models surfaces well but has no concept of lasting allowance, so it cannot produce a production pattern without workarounds. The software comparison sets out which tools do what.
Step 5 — Build the Tech Pack
The tech pack is what a factory actually works from. The sketch is a reference; the tech pack is the specification.
A complete footwear tech pack includes:
- Technical drawings with all views and dimensions
- The full pattern set, numbered, with piece counts
- Bill of materials: every material, colour, thickness, supplier reference and consumption
- Construction notes: stitch type, stitches per inch, seam type, edge finish
- Sole and heel specification, including mould references
- Last reference and size range
- Logo, hardware and trim placement with positions given from fixed reference points
- Packaging and labelling requirements
The rule that matters: anything unspecified will be decided by someone else. A tech pack that omits stitch density gets whatever the factory's default is, and that decision will show up in the sample.
Step 6 — Produce the Sample
The first physical sample — often called a proto or a confirmation sample — is made in the base size only. Its purpose is not to look finished. Its purpose is to expose what the drawing could not.
Expect the first sample to be wrong in ways nobody predicted. Materials behave differently from how they were specified; a seam that worked in 3D interferes with lasting; a reinforcement makes an area too stiff. This is normal and it is the point of sampling.
This is also where the 13-samples figure comes from, and where digital development pays for itself: catching a flattening error on screen costs an afternoon, catching it on a sample costs a round trip to the factory.
Step 7 — Review Fit and Construction
Fit review is done on the base size, on foot, ideally on more than one wearer, and against specific criteria rather than general impression:
- Length and toe clearance at the longest toe
- Girth at the instep — the most common source of fit failure
- Heel hold — whether the heel lifts when walking
- Flex point — whether the shoe bends where the foot bends
- Pressure points at seams, reinforcements and hardware
Construction review runs in parallel: seam quality, edge finish, sole attachment, symmetry between left and right. Each round produces a correction list that feeds back into the pattern, and the loop repeats until the sample is confirmed.
Step 8 — Grade to the Full Size Run
Only once the base size is confirmed does the design go to the full size range. Grading earlier means grading a pattern that will change.
Grading is not proportional scaling. Feet do not get uniformly wider as they get longer, so length, width and girth progress at different rates, and a linear scale-up produces bad fit at the ends of the run. Footwear CAD computes the progression from the last's own size series, which is why grading is one of the clearest arguments for a vertical tool over a generalist one.
Width fittings are separate series at the same lengths, not points on the same scale.
The Sequence, in One Table
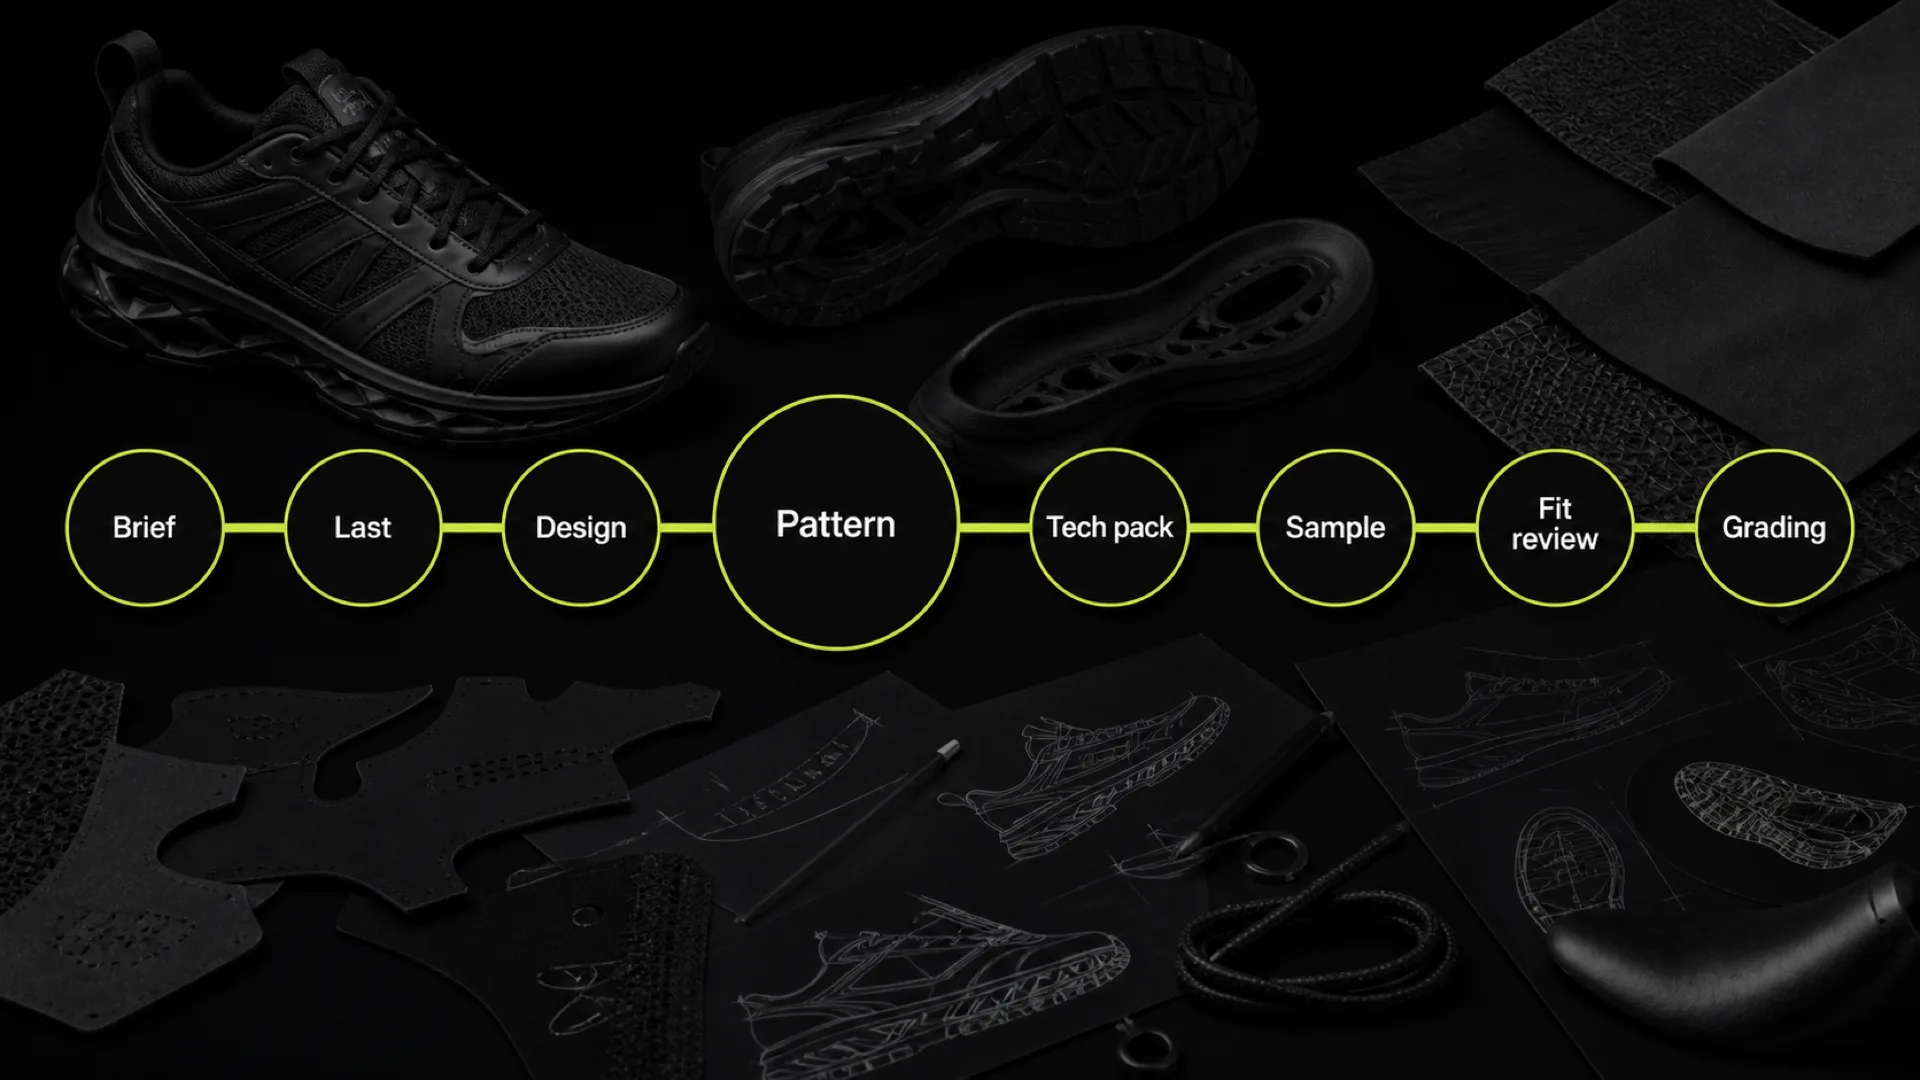
| Step | Output | Decides |
|---|---|---|
| 1. Brief | Constraints document | Cost ceiling, construction, size range |
| 2. Last | Last selected or developed | Fit, volume, silhouette, heel pitch |
| 3. Design | Flats, renders, 3D model | Appearance, materials, piece layout |
| 4. Pattern engineering | Flat pattern set | Whether it is buildable |
| 5. Tech pack | Full specification | What the factory will actually make |
| 6. Sample | Physical proto, base size | What the drawing got wrong |
| 7. Fit and construction review | Correction list | Whether it is wearable |
| 8. Grading | Full size run | Whether it fits everyone it should |
Where Beginners Lose Time
Four failure patterns account for most wasted development cycles:
Designing without a last. Produces a silhouette that has to be redrawn once a real last is chosen. Choose the last first.
Treating the sketch as the deliverable. The factory cannot build from a drawing. Time spent perfecting a render before the pattern exists is time spent on the wrong artefact.
Ignoring piece count. Every additional panel is a cutting operation, a stitching operation and a tolerance. Complexity added casually at the sketch stage shows up as cost and as fit variance.
Grading before the base size is confirmed. Guarantees the whole run has to be regraded.
FAQ
How long does it take to design a shoe?
From brief to confirmed sample, a straightforward style on an existing last typically takes several weeks to a few months, depending on how many sample rounds are needed. A new last, novel construction or custom sole tooling extends that considerably, because tooling lead times dominate. Digital pattern development compresses the sampling rounds, which is where most of the elapsed time sits.
Do I need to know how to draw to design shoes?
You need to draw well enough to communicate construction accurately — proportion, views, construction lines, dimensions. That is technical drawing, and it is learnable. Illustrative flair helps with presentation but is not what makes a design buildable. Increasingly the technical communication happens through the 3D model rather than the sketch.
What software do I need to design a shoe?
Adobe Illustrator for technical flats and tech pack drawings, plus a 3D environment for the upper and pattern. For production-ready pattern output that means footwear-specialised CAD — Icad Universe, Shoemaster, Romans CAD — because those handle last-based workflow, flattening and grading natively. Rhino is strong for sole and heel geometry; Blender and CLO3D are visualisation and material simulation rather than technical CAD.
Can I design a shoe without a factory?
You can complete every step through the tech pack independently. Producing a physical sample requires a sample room or a factory that accepts small development orders, and sole units generally require existing moulds unless you are funding tooling. Many independent designers start by designing onto an existing sole platform to avoid tooling cost entirely.
What is the difference between designing a shoe and making a shoe?
Designing produces the specification: the design, the pattern, the tech pack, the graded size run. Making produces the object: cutting, closing the upper, lasting, sole attachment, finishing. They are separate disciplines with separate skill sets. Understanding making makes you a better designer, because most design errors are errors about what the making process can absorb.
Where should a beginner start?
Start with the last and the pattern, not the sketch. Learning to read a last, place construction lines on it and flatten a simple upper teaches you more about footwear in a month than a year of drawing shoes will. Once the construction logic is in place, the design work has something to stand on — and it is the sequence a technical office works in.
Putting the Sequence into Practice
The reason this process is worth learning in order is that footwear punishes shortcuts more than most product categories. A shoe is a structural object worn against a moving body, and the last-pattern-sample loop is how the industry has learned to get it right.
If you want to build the middle of this sequence — the last, the 3D upper, the flattening, the pattern — the career path into 3D footwear design sets out where those skills lead.
I'm Susanna Zampieri — 3D footwear designer, official Icad Universe trainer and iCad Brand Ambassador. The 3D Footwear Design course follows exactly this order, from last import through pattern to render, because it is the order a technical office works in.