Shoe Pattern Flattening: From 3D Last to 2D Pattern (Step by Step)
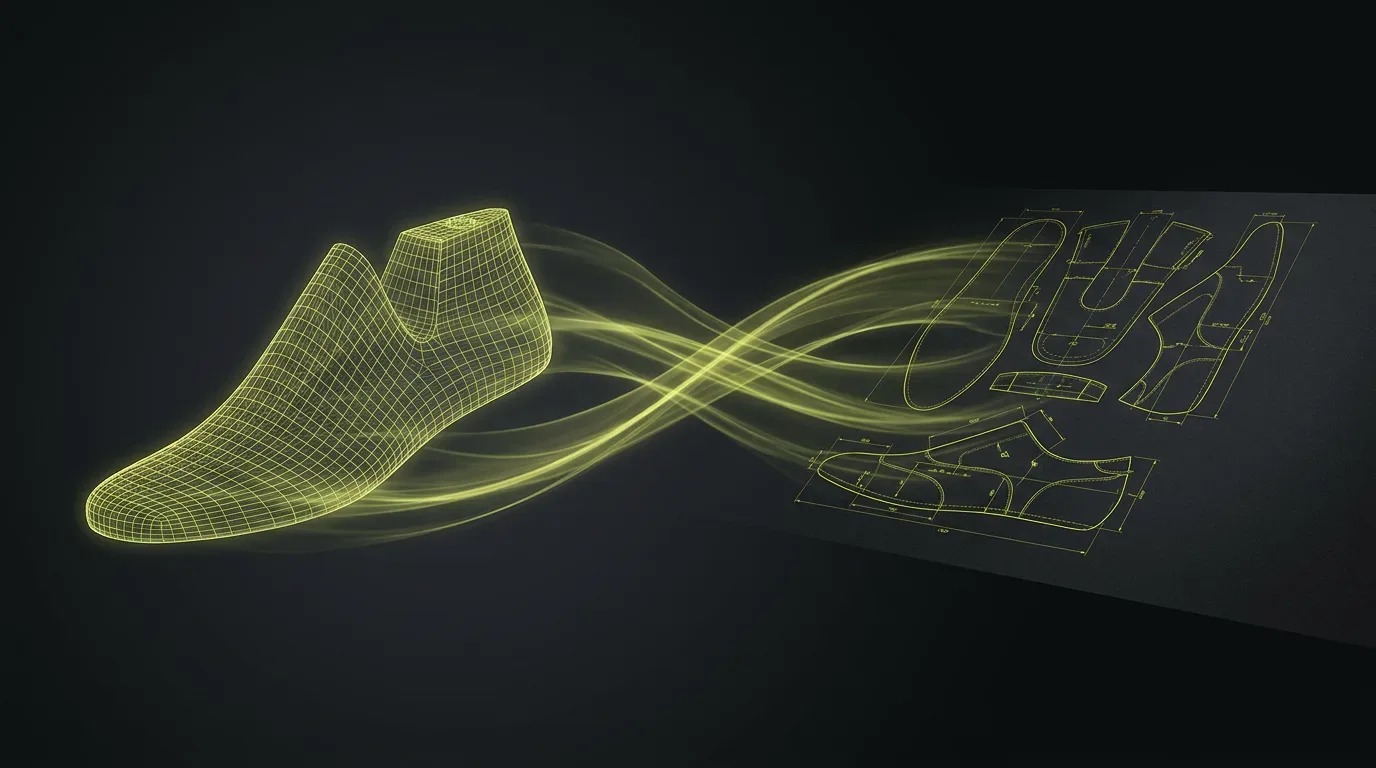
Every shoe starts with a paradox. The finished object is three-dimensional, shaped to a foot. But every piece of leather or synthetic that builds it must be cut flat. So at some point in the design chain, someone has to bridge those two realities, and that bridge has a name: shoe pattern flattening.
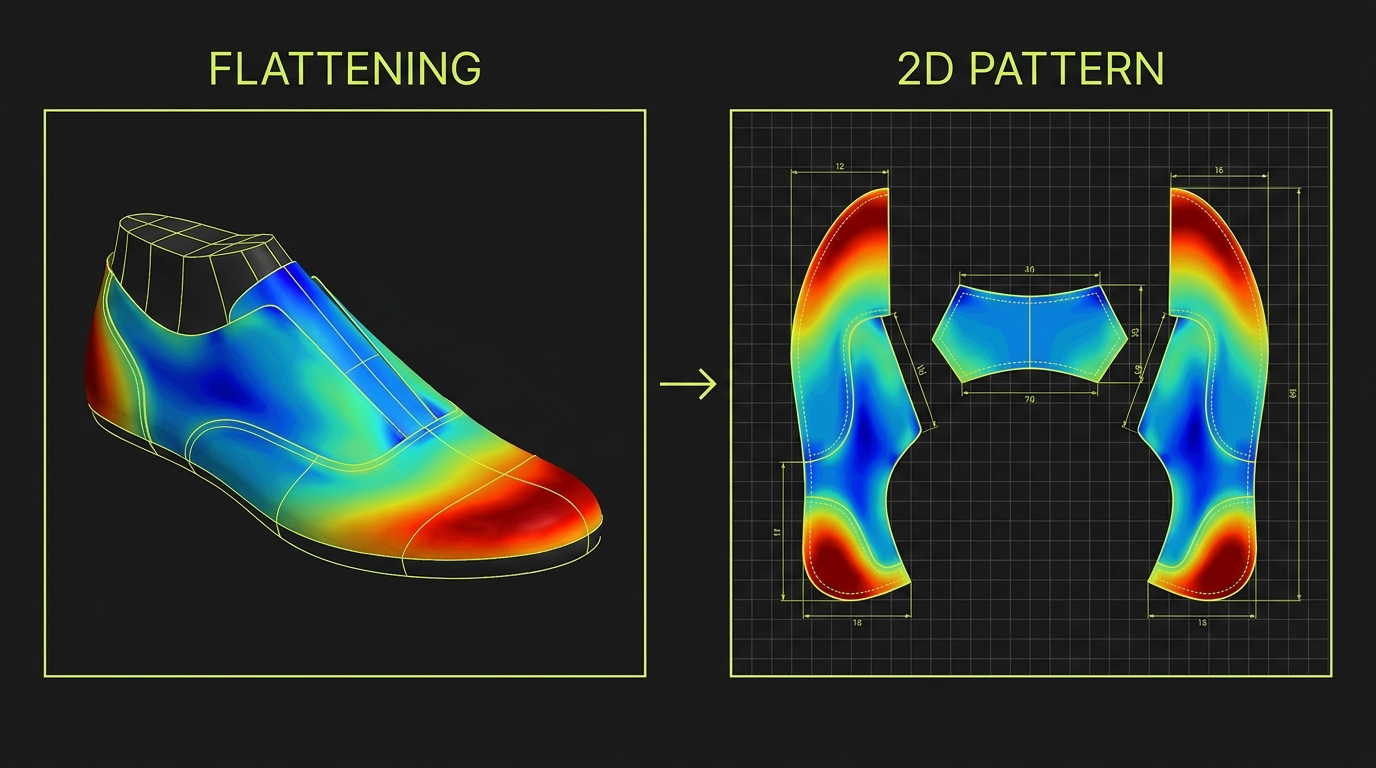
Flattening is the process of converting the curved surface of a shoe last into a flat 2D pattern, called the upper shell, that a cutter can actually use. It sounds like a simple unfold operation. It isn't. A shoe upper wraps a doubly-curved, non-developable surface, meaning it curves in two directions at once, exactly like the peel of an orange. You cannot unfold it into a flat plane without introducing distortion somewhere. The question is not whether distortion happens. The question is where you put it, and how much.
I've been working in 3D footwear design for over ten years, training designers at 50-plus luxury brands on Icad Universe as an official Icad Universe trainer. Pattern flattening is consistently the module that surprises people most. Students expect automation. They find, instead, a set of conceptual decisions baked into every click.
This guide explains why shoe uppers resist simple unrolling, how flattening algorithms actually work, and how to run the full workflow in both Rhino (via the Squish command) and dedicated footwear CAD. We also cover lasting allowance dimensions and grain direction, two inputs the algorithm needs to know about before you export anything.
For the broader career context, read how to become a 3D footwear designer first. If you haven't yet modeled your last digitally, start with the shoe last 3D modeling guide.
Key Takeaways
- Shoe uppers are non-developable surfaces: they cannot be unrolled flat without distortion, so flattening algorithms distribute that distortion as evenly as possible.
- Professional tolerance between the inner and outer half of a flattened shell is 0-2 mm. Anything beyond that means your centerline is wrong.
- Rhino Squish marks compression zones (red) and stretching zones (green), but it struggles with full lasts and needs panel splitting for complex geometry (McNeel Rhino 8 Docs).
- Icad Universe (INESCOP) runs the same workflow automatically, handles boots and moccasins, and keeps 3D and 2D environments live simultaneously (INESCOP).
- Standard lasting allowance is 15 mm at seat and waist, 12 mm at the forepart (Shoemaking Wiki).
Why a Shoe Upper Cannot Simply Be Unrolled
Shoe uppers are non-developable surfaces: they curve simultaneously in multiple directions and cannot be unrolled into a flat plane without membrane distortion, unlike cylindrical or conical surfaces, which are developable and can be unrolled without any distortion at all (McNeel Rhino 8 Official Docs, Squish command). This is the core reason pattern flattening exists as a discipline rather than as a simple geometry operation.
Think of peeling an orange and trying to press the rind flat. You get cracks and folds. The surface simply does not have the right internal geometry to lie in a plane. A shoe last has the same problem: the toe box curves downward and inward at the same time, the instep swells in three dimensions, and the heel counter wraps a compound curve. None of those zones flatten without at least some material either bunching (compression) or pulling (stretching).
What changes in the digital workflow is control. Instead of physically forcing the material flat with your hands, an algorithm distributes the necessary distortion across thousands of small triangular facets, keeping any single zone within a tolerance the material can absorb. US Patent 11,972,537 explicitly describes this: the non-developable upper surface is converted into a 2D grid model with low distortion, and the algorithm accounts for both material grain direction and stretch during the unfolding optimization (USPTO, Patent 11972537).
Understanding this is not just academic. Every downstream decision, where you split your design into panels, how you orient each piece to the grain, where you place seams, follows from where the algorithm is concentrating distortion. Knowing the surface geometry tells you where the seams need to go.
How Flattening Algorithms Work: Minimizing Strain Energy
Flattening algorithms work by meshing the 3D surface, then iteratively minimizing a combination of area distortion and edge-length distortion across every facet in the mesh. Rhino's Squish command, for example, minimizes changes in facet area and facet edge lengths between the 3D mesh and its 2D projection, then marks compression zones in red and stretching zones in green, with up to 10 text-dot annotations at the most distorted locations (McNeel Rhino 8 Official Docs, Squish command).
The analogy to cartography is exact. A world map on flat paper always distorts something: either areas, or shapes, or distances. Different projections make different trade-offs. Flattening a shoe upper is the same optimization problem, constrained to a much tighter tolerance because a pattern error of a few millimeters produces a shoe that does not fit.
The algorithm's quality depends heavily on mesh topology. The 3DShoemaker plugin for Rhino uses quad-meshed surfaces rather than triangulated ones because quads distribute strain more evenly and "squish better" than triangular meshes (3DShoemaker, Flattening Shoemaking Patterns). In dedicated footwear CAD, the meshing step is handled internally and is not visible to the user, but the principle is identical.
A second input the algorithm uses, and one that most introductory guides skip entirely, is anisotropic material stretch. Natural leather does not stretch equally in all directions. It stretches more across the grain than along it. A flattening algorithm that ignores this produces a pattern that looks correct on screen but is wrong in production: the upper will pull in one direction during lasting and shift the whole design.
The Rhino Squish Workflow: What It Does Well and Where It Breaks
Rhino's Squish command is the most widely documented approach to shoe upper flattening outside of dedicated footwear CAD, and for small studios with an existing Rhino pipeline it's a reasonable starting point. It is, however, a general-purpose surface flattening tool, not a footwear-specific one, and its limitations become obvious quickly.
What Squish Does Well
Squish works cleanly on moderate-curvature surfaces that have been properly prepared. It gives immediate visual feedback through its red/green distortion map. The 3DShoemaker plugin wraps it into a footwear-friendly UI, adding quad meshing and letting the user tune the compression-to-stretch ratio (3DShoemaker, Flattening Shoemaking Patterns). For simple oxford or derby upper zones, the result is serviceable.
Where Squish Struggles
Squish is not suitable for developable surfaces, which should use UnrollSrf instead, and it does not perform well on heavily curved objects flattened in a single operation. The McNeel forum explicitly recommends splitting the geometry into multiple panels before running Squish on a shoe last (McNeel Discourse, "Flatten Upper from Shoe Last Using Squish" thread). In practice this means the designer must manually define split lines, run Squish on each panel separately, then reassemble and reconcile the edges, a process that requires real surface geometry knowledge and takes time.
Boots are particularly difficult. The ankle and shaft add compound curvature that Squish cannot resolve in a single pass. Moccasins, with their continuous one-piece upper, are even harder. Neither is a practical Squish use case without significant manual intervention.
Dedicated Footwear CAD Flattening: Icad Universe
Icad Universe from INESCOP is described as the first software for footwear design and pattern engineering that gathers two working environments, virtual 3D and technical 2D, into a single program operating simultaneously, so any modification in one space is automatically reflected in the other (INESCOP, Icad Universe page). This bidirectional link is what separates it from a general-purpose surface tool. Its flattening technology can automatically flatten boot lasts, historically a difficult case, and is documented as the only software that allows flattening moccasins easily, with millimetric precision (iCad Discovery).
The practical difference versus Rhino Squish comes down to three things. First, the mesh generation is automatic and footwear-optimized; you don't choose between quads and tris. Second, the 3D/2D link means that if you adjust a line on the 3D last after flattening, the 2D shell updates automatically. Third, quality control is built into the workflow rather than being a separate step you have to engineer yourself.
For a full feature comparison across the major footwear CAD tools available, see best software for shoe design: comparison.
Step-by-Step: The Full Flattening Workflow in Icad Universe
The six steps below reflect the actual Icad Universe workflow. Each step has a logic that mirrors traditional pattern-making methods, translated into digital operations.
Step 1: Prepare the Last with Reference Lines
Everything starts with three lines on the 3D last:
- Vamp line: the upper boundary of the upper, from the throat to the toe.
- Feather line: the lower perimeter where the upper meets the insole board.
- Fit line: a three-point anchor line that communicates the last's volume personality to the algorithm.
These are not decorative. They are the geographic boundaries of the territory the algorithm will flatten. In my experience with students coming from Rhino, misplacing these lines is where most errors originate. Every millimeter of positioning propagates into the shell.
Step 2: Calculate the Centerlines
The software calculates two centerlines: front (at the toe tip) and back (at the center of the heel). They act as symmetry axes, dividing the last into its inner and outer half. The front centerline is the critical one. A mis-positioned front centerline produces an asymmetric shell, and an asymmetric shell means nothing downstream can be trusted.
Step 3: Generate the Surface Mesh
Icad Universe builds a triangulated grid across the entire last surface within the reference lines defined in Step 1. This is the "invisible" step, but it is where the algorithm's accuracy is established. Think of covering the last with a fine net: each cell is a small planar triangle that approximates local curvature. The finer the mesh, the more faithful the resulting shell.
Step 4: Run the Flattening Algorithm
The algorithm opens each triangle from the mesh and recomposes it in the plane, optimizing distortion distribution across the whole surface. The result, the upper shell, appears in the 2D environment in seconds. This is where the math happens. What the designer controls is the quality of the inputs, not the calculation itself.
Step 5: Quality Check - Symmetry Verification
This is where professional judgment re-enters the process. Icad Universe lets you overlay the inner and outer half of the shell to verify symmetry. The acceptable tolerance is 0-2 mm of deviation. Beyond that threshold, the front centerline positioning is incorrect and must be adjusted. You go back to Step 2, correct the line, recalculate. This loop is not a failure state. It is the process.
A non-symmetric shell produces distorted patterns. Distorted patterns produce shoes that don't fit. Spending two minutes on the symmetry check saves hours in prototyping.
Step 6: Smooth and Finalize
Once symmetry is confirmed, the shell profile is smoothed to remove the sharp edges that triangulation introduces. The outline is optimized for the next stage: drafting the actual upper components onto the shell.
The shell is complete. It is not a production pattern. It is the map from which all production patterns will be drawn.
Lasting Allowance: How Much Material to Add and Where
Standard lasting allowance dimensions are 15 mm at the seat and waist areas and 12 mm at the forepart, blended between zones. Additional allowances include 2 mm for the stiffener, plus 5 mm fold and 1.5 mm seam allowance in a court shoe example (Shoemaking Wiki, Pattern Cutting Step-by-Step). These are the material extensions that wrap under the insole board during lasting, and getting them wrong wastes material or causes the upper to pull off center.
Lasting allowance is not part of the flattening algorithm. It is added to the shell after flattening as a separate offset operation. But it depends on the shell being accurate in the first place: if your shell has even 2-3 mm of systematic error, your lasting allowance will compound that error around the full perimeter.
The 15 mm / 12 mm split reflects the biomechanical reality of how a last tightens onto the insole. The seat and waist take more material because the curve there is tighter and requires more fabric to wrap cleanly. The forepart needs less because the surface flattens toward the toe.
| Zone | Lasting Allowance | Notes |
|---|---|---|
| Seat and waist | 15 mm | Blended at zone boundaries |
| Forepart | 12 mm | Reduced due to flatter geometry |
| Stiffener area | +2 mm | Plus 5 mm fold allowance |
| Standard seam | 1.5 mm | Court shoe reference |
Source: Shoemaking Wiki, Pattern Cutting Step-by-Step
Grain Direction and Material Stretch: What the Algorithm Needs to Know
Grain direction matters because natural leather is an anisotropic material: it stretches more across the grain than along it. US Patent 11,972,537 on shoe upper flattening explicitly accounts for material grain direction and stretch characteristics during the unfolding optimization, treating them as required inputs rather than optional refinements (USPTO, Patent 11972537).
In practice, this means the orientation of each pattern piece relative to the leather hide is a technical decision, not just a nesting efficiency decision. A vamp piece cut on the wrong grain will stretch along the wrong axis during lasting, shifting the entire upper design by several millimeters.
Dedicated footwear CAD allows the designer to annotate grain direction on the 2D pattern and flag pieces where the algorithm's distortion output is concentrated along the grain axis. In Rhino Squish, this input must be managed manually, typically by running Squish separately on panels that have been oriented with grain in mind.
Automatic vs Manual Flattening: Which to Choose
| Criteria | Rhino Squish (manual) | Icad Universe (automatic) |
|---|---|---|
| Setup complexity | High: requires panel splitting, manual mesh tuning | Low: reference lines define the boundary; rest is automatic |
| Handles boots | Poor: requires multiple split operations | Yes: automatic and documented as reliable |
| Handles moccasins | Very difficult | Yes: claimed unique capability |
| Bidirectional 3D/2D | No: one-way export | Yes: changes in 3D update 2D automatically |
| Grain direction input | Manual | Annotated in 2D environment |
| Best for | Small Rhino studios, simple uppers, exploratory work | Professional production, complex lasts, team workflows |
The Rhino Squish path makes sense if you already live inside Rhino for last modeling and your uppers are relatively simple. The moment you are working on boots, moccasins, or any design that requires multiple iteration rounds, dedicated footwear CAD pays for itself in time alone.
If you're building the full production sequence in 3D, the logical next step after the upper shell is how to model a shoe upper in 3D, followed by 3D sole and heel design.
Why Digital Flattening Reduces Prototyping Cost
The traditional tape method produces excellent results in the hands of an experienced pattern maker. But it has structural limits that digital flattening removes on four concrete fronts.
Repeatability. Every manual tape application produces slightly different results. Given the same last and the same reference lines, Icad Universe produces identical shells every time. This matters in industrial production, where a single last may be used across hundreds of models over several years.
Speed. Applying tape to a last, peeling it, laying it flat, and refining it takes hours. The digital process takes minutes, including quality control.
Traceability. The digital file is a permanent record. You can reopen a last from three years ago and re-flatten it immediately, even if the original designer is no longer at the company.
Workflow integration. The digital shell feeds directly into pattern-making software, eliminating the paper-to-scanner step that introduces additional error in the traditional workflow.
To see how flattening fits into the complete design-to-production sequence, read what is Icad Universe and what it does.
FAQ
What is shoe pattern flattening?
Shoe pattern flattening is the process of converting the curved 3D surface of a shoe last into a flat 2D pattern, called the upper shell. Because shoe uppers are non-developable surfaces that curve in multiple directions simultaneously, the process uses algorithms that minimize distortion across a triangulated mesh rather than a simple geometric unroll (McNeel Rhino 8 Docs).
Does every last need a separate flattening?
Yes. Flattening is specific to each last's geometry. Even moving one size up within a family, say from a size 37 to a size 39, produces a geometrically different last that needs its own shell. In Icad Universe, once you've set up the workflow for a last family, replicating it across sizes takes a few minutes with proportioned reference lines.
Why does Rhino Squish struggle with shoe lasts?
Squish works on moderate curvature and performs poorly on heavily curved objects flattened in one operation. The McNeel forum recommends splitting the last geometry into multiple panels before running Squish (McNeel Discourse thread). Boots and moccasins are particularly difficult because their compound curvature requires extensive manual splitting, reassembly, and edge reconciliation.
What is the correct lasting allowance?
Standard lasting allowance is 15 mm at the seat and waist, 12 mm at the forepart, blended at the transitions. Additional material is added for stiffener areas (2 mm) and fold allowance (5 mm). These dimensions assume a standard court shoe construction; other construction types use different values (Shoemaking Wiki).
Does grain direction affect the flattening result?
Grain direction affects how the material behaves in production, not the algorithm's output directly. But if pattern pieces are cut on the wrong grain axis, the upper will stretch in the wrong direction during lasting and shift the design. US Patent 11,972,537 on upper flattening treats grain direction as a required input to the optimization process, not an optional consideration (USPTO, Patent 11972537).
Learn Pattern Flattening in the 3D Footwear Design Course
The upper shell is not the endpoint. It's the starting point. Once you have a clean, symmetric shell, the drafting work begins: placing the vamp line, building the counter, positioning the tongue, developing reinforcements. All of that drafting happens on top of the shell, and every decision traces back to how accurately the shell represents the last.
If you want to learn this workflow hands-on, step by step, from last preparation through shell generation to full pattern drafting, the 3D Footwear Design course by Susanna Zampieri covers the complete Icad Universe production sequence.