Shoe Last 3D Modeling: A Practitioner's Complete Guide
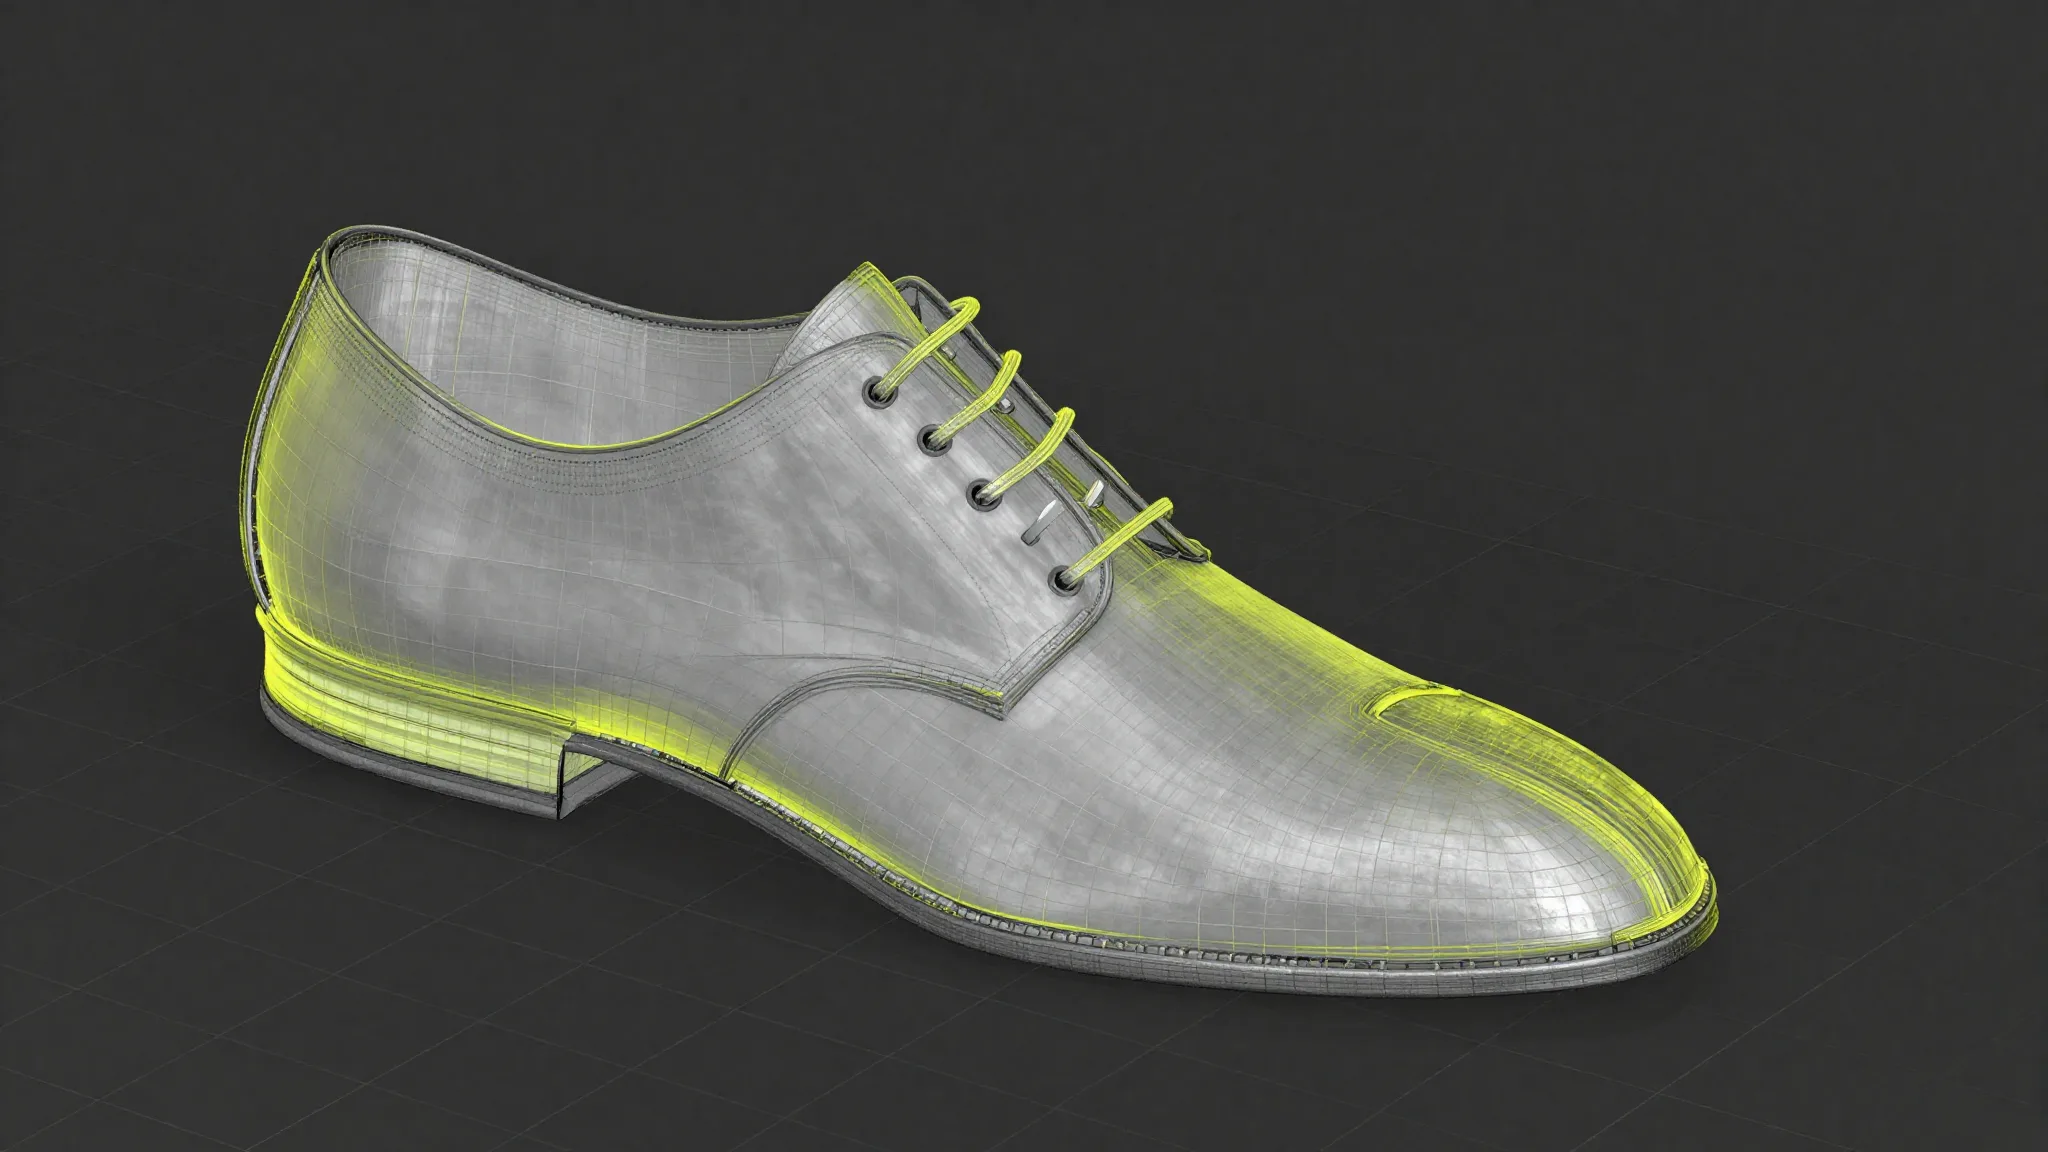
Every shoe starts with a last. Not a sole, not an upper pattern, not a design sketch — the last. It's the three-dimensional foot-shaped form around which every component of a shoe is built. Until you have a clean, correctly oriented digital last in your CAD environment, nothing else you model will be accurate.
This guide covers the full workflow: what a shoe last actually is anatomically, how to import or build one in CAD software, how to adjust key parameters (toe spring, heel pitch, girths), how to convert a foot scan into a workable last, and how to export a last for 3D printing. The competitive SERP for "shoe last 3D modeling" is dominated by either dense academic PDFs or surface-level overview articles. Neither gives practitioners the vocabulary and step-by-step clarity they actually need. We're filling that gap here.
Key Takeaways
- The last is the volumetric core of every footwear project — get it wrong and errors compound through every later stage.
- Digital last production via CNC completes in 12-14 min/pair vs. 45-60 min/pair by hand (Surya et al., Frontiers 2025).
- Toe spring, heel pitch, and three girth measurements (ball, waist, instep) are the five parameters you must understand before touching any last.
- Foot-scan-to-last workflows now reach 0.05 mm precision, making custom last design practical even for small studios.
- 3D-printed lasts in SLS TPU outperform FDM prints for precision and durability — material choice matters.
How to become a 3D footwear designer
What Is a Shoe Last, and Why Does It Control Everything?
The last is a three-dimensional solid form — historically carved from wood, now milled from polyethylene or modeled in CAD — that replicates the shape of a human foot with deliberate ergonomic and style corrections applied. In any CAD shoe design workflow, the digital last is the first file you load. Without it, the software has no volumetric reference on which to map the upper surface, and operations like pattern flattening or sole positioning have no geometric anchor.
Think of the last as a coordinate system for the entire shoe. The upper wraps its surface. The insole closes its bottom. The heel component references its pitch. Even the outsole is designed relative to the last's footprint. A poorly prepared last propagates errors through every downstream component — errors that typically surface only late in the process, when fixing them is expensive.
In a physical sample room, a flawed last means wasted leather and lost prototype hours. In a digital workflow, a flawed last mesh means distorted flat patterns and incorrect grading. The stakes are the same; the feedback loop is faster when you catch problems early.
For a broader overview of how the last fits the full digital design sequence, see how to become a 3D footwear designer.
What Are the Key Anatomy Terms Every Last Modeler Needs?
Before touching any CAD tool, you need to own the vocabulary. Footwear professionals use specific terms that don't translate cleanly from general 3D modeling language. Confusing these terms in a client brief or a factory specification leads to expensive misunderstandings.
Toe Spring
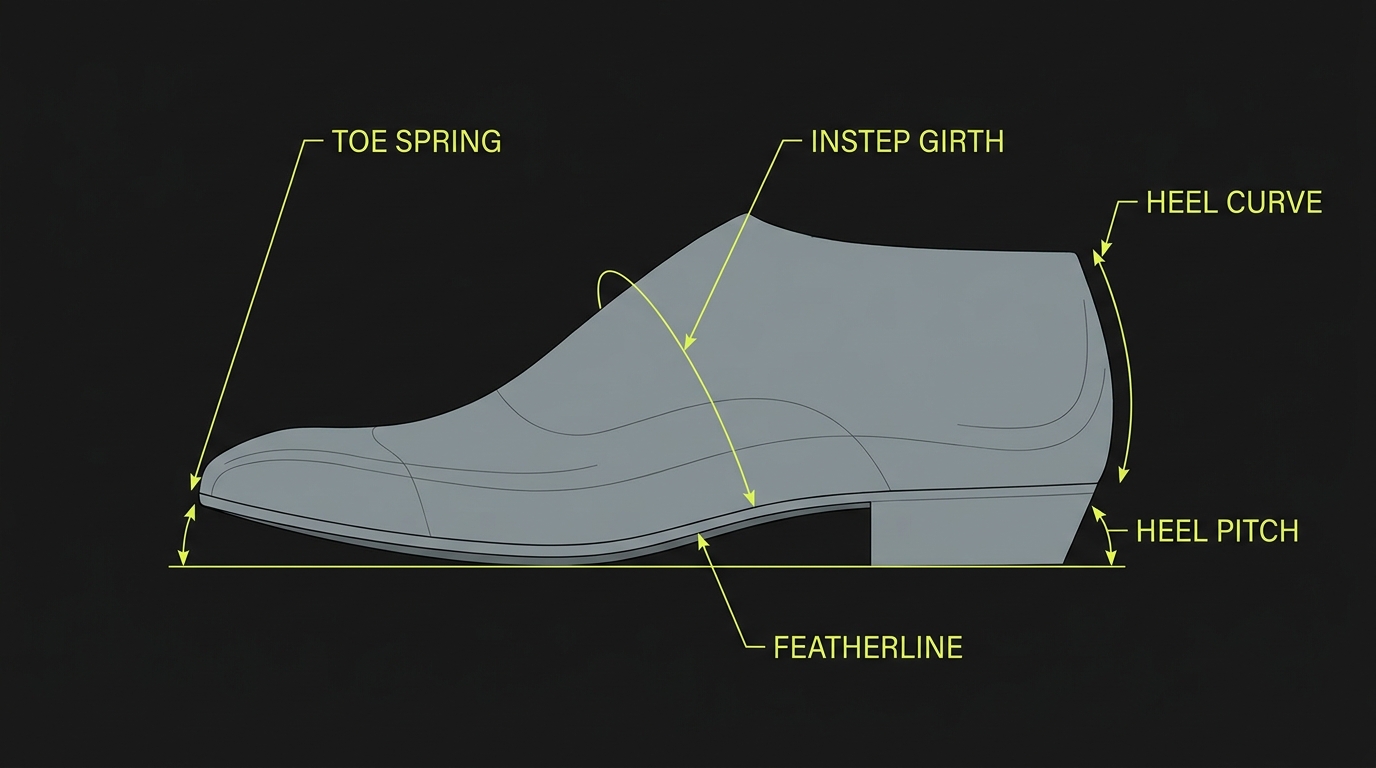
Toe spring is the upward angle of the last's toe tip relative to the flat resting plane of the heel. Measured in millimeters of elevation at the toe tip, it controls how the shoe rocks forward during the walking gait. A ballet flat might have near-zero toe spring; a running shoe might have 20 mm or more. Changing toe spring affects the entire forefoot geometry of the upper pattern.
Heel Pitch
Heel pitch is the height difference between the heel seat and the forepart resting plane. A flat sneaker last has a heel pitch of roughly 10-12 mm (a small ergonomic rise). A stiletto last might have 100 mm or more. Heel pitch and toe spring are interdependent: changing one without recalculating the other shifts the stance angle of the entire last.
Girths
Girth measurements are the circumferences taken at three cross-sections of the last:
| Girth Point | Location | What It Controls |
|---|---|---|
| Ball girth | Widest forefoot width | Fit across the metatarsal heads |
| Waist girth | Narrowest mid-foot point | Arch fit and waist aesthetics |
| Instep girth | Highest point of the arch | Ease of entry, strap and collar position |
A peer-reviewed 3D foot-scan study of 1,214 school-aged children found that boys' ball area averaged 1,021 mm² versus 866 mm² for girls (p < 0.001), with ball perimeter 207.5 mm versus 192.4 mm. Unisex lasts become anatomically inappropriate from shoe size 32 onward (Pereira Domínguez et al., Journal of Foot and Ankle Research, 2025). This is direct evidence that last libraries must be segmented by population group, not just by size.
Feather Edge and Tread Line
The feather edge is the perimeter line running around the bottom of the last where the upper transitions to the sole. The tread line is the flat contact surface of the bottom. In CAD, both lines are critical references for sole design and for defining the insole board. In Icad Universe (developed by INESCOP, the Spanish footwear technology institute), these lines are generated automatically during the "Create manufacturing last" step — but their accuracy depends on the quality of your mesh and your positioning.
How Do You Import an Existing Last into Footwear CAD Software?
Most practitioners start with a last from a library rather than modeling one from scratch. Your factory supplier, your last manufacturer, or your own archive provides the base geometry. The workflow in dedicated footwear CAD tools (Icad Universe, Romans CAD, Shoemaster) is consistent: import a standard mesh format, let the software convert it to its native format, then orient and validate before doing any further work.
Compatible import formats in Icad Universe include .igs/.iges (the mechanical CAD standard, common from industrial suppliers), .stl (the 3D printing mesh format, universal and simple), .obj (the most interoperable general 3D format), and .wrl (VRML, still used in some older footwear workflows). For Rhino users working with the 3DShoemaker plugin, the SubD and NURBS geometry exports map cleanly into .obj for downstream import.
Once imported, the software converts the mesh to its native format automatically. A lightweight mesh (tens of thousands of polygons) converts in seconds. High-resolution scan data takes longer.
The single most common mistake at this stage is skipping orientation validation. Depending on how the last was built in the originating software, it may arrive upside down, rotated 90 degrees, or displaced far from the origin. In Icad Universe, the Position panel shows a guide image: heel to the left, toe to the right, sole facing downward. If your last doesn't match that orientation, you correct it before doing anything else — interactively with Shift (translate) and Ctrl (rotate), or numerically by entering exact angle values in the Rotation fields.
The reason this matters: mesh orientation errors propagate to every downstream calculation. Centerlines, girth measurements, and the flattening mesh all depend on the last being correctly seated in space.
For a direct comparison of which CAD tools handle last import best for different studio sizes, see best software for shoe design.
How Does a Foot Scan Become a Workable Shoe Last?
The scan-to-last workflow is where custom and bespoke footwear gets its geometric foundation. A foot scanner captures the three-dimensional surface of the foot as a point cloud, which is then processed into a mesh. That mesh is the anatomical starting point for a custom last. This is the practitioner-level workflow nobody in the current SERP explains end to end.
The process has three stages.
Stage 1: Capture and Clean the Foot Scan
Modern foot scanners reach sub-millimeter accuracy. The SHINING 3D FootStation 2 (launched August 2024) achieves 0.05 mm precision and captures both the instep and the plantar surface simultaneously, returning an STL file ready for immediate CAD import (SHINING 3D, 2024). INESCOP's own scanner hardware is widely used in orthopedic and bespoke footwear clinics.
The raw scan captures the foot as scanned — including soft tissue compression from the scanner bed, surface noise, and possibly scan artifacts around the ankle. Before importing into your last-making workflow, clean the mesh: remove artifacts, close any holes, and verify there are no inverted normals. Meshlab (free) or Meshmixer handle most of this preprocessing.
Stage 2: Convert Scan Geometry to Last Geometry
A foot scan is not a last. A foot scan captures the foot in a relaxed, unloaded state. A last must account for the positive ease the shoe design requires, the load redistribution during wear, the toe box shape, and the style-specific heel pitch and toe spring. The scan is the starting reference — not the final deliverable.
In practice, you import the cleaned scan mesh as a reference object in your CAD environment, then model or deform a base last to match it. In Rhino with 3DShoemaker, this often means using SubD modeling with the scan as a cage guide. In Icad Universe, you import the scan directly and use the deformation tools to adapt a standard last to the scan's key measurements.
The parametric approach is more efficient: extract girth measurements from the scan, then apply those parameters to an existing base last rather than sculpting the geometry from scratch.
Stage 3: Apply Style Parameters
Once the last geometry matches the foot's key measurements, apply the style parameters: set heel pitch, adjust toe spring, refine the waist, and finalize the feather edge line. This is where the last stops being a foot cast and becomes a shoe-making tool. These adjustments are made numerically in your CAD software, not by hand.
A research study of children's foot morphology using INESCOP's own scan technology found statistically significant differences in ball girth and perimeter between sex groups as early as shoe size 32, confirming that single-population last libraries are anatomically insufficient for custom work across diverse client bases (Pereira Domínguez et al., JFAR 2025).
How Do You Grade a Last Digitally, and Why Does It Matter?
Digital grading is the process of scaling a master last up or down to produce a full size run. In traditional last making, grading was done by hand with calipers and templates — a skilled job that took hours per size. Digital grading in CAD reduces this to a parametric calculation.
Properly graded lasts maintain geometric proportions at each size: the girth-to-length ratios stay consistent, the heel-to-ball relationship scales correctly, and the toe spring value remains appropriate for the shoe type. Naive uniform scaling (just multiplying all dimensions by a size factor) distorts these ratios.
SDF-based CNC last production demonstrates how efficient digital workflows become at scale: automated CNC completes 12-14 minutes per pair versus 45-60 minutes per pair by traditional hand methods, a 70-75% speed improvement, with 80% reduction in manual intervention and sub-0.5 mm dimensional tolerances with rejection rates below 1% (Surya G., Anbarasan P., Suresh B., Frontiers in Mechanical Engineering, 2025). The same study found cumulative savings of 40-50% over 5-7 years versus traditional workflows, with full ROI on automation investment in 30-36 months.
Parametric last software, such as the 3DShoemaker plugin for Rhinoceros, allows you to define a master last with explicit parameters (ball girth, waist girth, heel width, toe spring, heel pitch) and then generate graded sizes by adjusting those parameters along a grading table. This is the approach large-scale manufacturers use. For smaller studios, maintaining a library of pre-validated lasts at common sizes — and adapting them to custom measurements rather than starting from scratch — is the practical equivalent.
How Do You Prepare a Shoe Last for 3D Printing?
The global 3D-printed shoes market was valued at USD 1.64 billion in 2023 and is projected to reach USD 5.38 billion by 2030 at a CAGR of 18.6%, with North America holding a 39% share in 2023 (Grand View Research, corroborated by 3DPrint.com, January 2026). That growth is being driven partly by the adoption of 3D-printed lasts for prototyping and custom footwear, where the turnaround from digital file to physical last has dropped from weeks to days.
Printing a last is not as simple as exporting to STL and hitting print. Several preparation decisions determine whether your printed last is usable.
Material Choice
| Material | Process | Pros | Cons |
|---|---|---|---|
| PLA | FDM | Low cost, widely available | Brittle, deforms in lasting oven heat |
| PETG | FDM | Better nail-holding than PLA, heat-tolerant | Less precise than SLS |
| Nylon PA12 | SLS | High precision, production-grade durability | Higher cost, requires service bureau |
| TPU | SLS | Flexible, ideal for orthopedic lasts | Slower build, higher cost |
SLS-printed lasts in TPU deliver significantly higher precision and robustness than FDM-printed lasts and withstand typical lasting process loads and oven temperatures. PETG is the recommended FDM filament for lasts when SLS is not available: it holds nails better than PLA and resists the heat of lasting operations (PROTIQ GmbH, orthopedic footwear technology page, accessed June 2026). If you're printing lasts for professional use rather than concept prototypes, SLS PA12 or TPU is the right choice.
Hinge Joint and Split Last Design
A solid one-piece last cannot be removed from a finished shoe. In traditional footwear, lasts are either straight (pulled out from the toe after lasting) or hinged (the front section pivots inward for removal). For 3D printing, the split-last design — where the last prints in two sections that separate at a hinged or interlocking joint — is the most practical approach for closed-toe shoes.
Model the split line and the hinge joint in your CAD software before exporting. The joint interface needs to be clean and precise so the two halves register correctly during lasting. Add a small pocket for a standard bolt or printed pin to hold the halves together while the adhesive cures.
Print Orientation and Support Strategy
Orient the last with the heel down and the toe up. This minimizes support structures on the bottom surface (the feather edge and tread line), which are the highest-precision areas. Supports on the upper surface are easier to remove and leave marks in less critical zones.
Wall thickness matters: a minimum of 3-4 mm walls gives adequate rigidity for lasting operations. The tread line area benefits from solid infill (80-100%) to resist the pulling forces during lasting.
TPM3D's SLS workflow demonstrated at CISCE 2025 compresses the traditional 20+ manufacturing steps to three (scan, design, print), completing a finished shoe in 25 minutes with a 38-hour build cycle yielding 90 finished shoes. Note this is a manufacturer claim from a press release without independent third-party corroboration at time of writing (TPM3D, press release, July 2025).
How Does Last Modeling Connect to Upper Design and Pattern Flattening?
The last-to-upper connection is the reason last quality matters so much. In a 3D footwear CAD workflow, the upper is designed directly on the last surface. Style lines are drawn on the three-dimensional geometry, following the real curvature of the last. When those style lines are then flattened into 2D patterns, the math of the flattening algorithm depends on the mesh quality and the accuracy of the flattening mesh that was generated during last preparation.
In Icad Universe, the flattening mesh — a grid of lines computed over the last's surface — is generated in a multi-step process. The mesh is validated by color: areas where the mesh floats above the geometry appear blue; areas of overlap appear red. A clean last with no blue or red zones in the error check produces accurate pattern pieces. A last with mesh errors produces distorted patterns that won't sew together correctly at the factory.
This is why last preparation is never a step to rush. We've seen students bring last files into the upper design stage with mesh errors they hadn't noticed, then spend hours tracing back distorted pattern issues to a five-minute skip in the positioning and mesh-generation workflow. The connection between last quality and pattern accuracy is direct and non-negotiable.
For a complete tutorial on building the upper once your last is prepared, see how to model a shoe upper in 3D. For the next step in the production sequence, shoe pattern flattening from 3D to 2D covers the full flattening workflow.
Start Learning: The Full Workflow from Last to Finished Shoe
Mastering shoe last 3D modeling is the foundation of every other skill in digital footwear design. The last controls the upper, the sole, the pattern, and ultimately the fit. Getting comfortable with last anatomy, import workflows, girth adjustments, and print preparation puts you ahead of most practitioners working in the field right now.
Susanna Zampieri, certified Icad Universe trainer with more than 10 years in the footwear industry, 50+ luxury brands in her client portfolio, and 100+ students trained, guides you through the complete workflow — from last preparation through upper design, sole modeling, flattening, and photorealistic rendering — in a structured online course. See the full curriculum at 3D Footwear Design Course.
FAQ
What file format is best for importing a shoe last into CAD software?
OBJ and STL are the most reliable formats for last import because their mesh structure is straightforward and well-supported across tools. IGES is common from industrial suppliers but can introduce imprecisions when converting NURBS to polygon mesh on complex curves. If your supplier can export OBJ, request it first. Always validate the imported mesh with the software's error-check tool before proceeding.
Can I use a foot scan directly as a shoe last in my CAD workflow?
Not directly. A foot scan captures the relaxed unloaded foot, while a last must incorporate positive ease, style adjustments, toe spring, and heel pitch. Use the scan as a reference to adapt an existing base last or to extract key measurements (ball girth, instep girth, foot length) that drive parametric adjustments to a master last. The scan is the starting geometry, not the finished tool.
What causes distortion in flat pattern pieces after flattening a last?
Distortion in flattened patterns almost always traces back to an error in last preparation. Common causes: the last was not correctly oriented before the manufacturing last was created, the flattening mesh was generated with too-coarse density settings, or the mesh has areas of geometric error (hover or overlap) that weren't corrected in the error-check step. Fix the last first, then regenerate the flattening mesh, rather than trying to correct distortion in the 2D pattern.
What is the best material for 3D printing a shoe last?
For production-quality printed lasts, SLS-printed Nylon PA12 or TPU is the right choice: higher precision, better surface quality, and it withstands lasting oven temperatures (PROTIQ GmbH, 2026). For prototyping on a desktop FDM printer, use PETG rather than PLA. PETG holds nails better and is less likely to deform under the heat and mechanical stress of the lasting operation.
How does digital grading differ from simply scaling a last uniformly?
Uniform scaling multiplies all dimensions by the same factor, which distorts key proportions: girth-to-length ratios shift, and the heel-to-ball relationship no longer follows the correct size progression. Digital grading applies size increments along a grading table that specifies how each measurement (ball girth, waist girth, heel width, length) increases independently between sizes, maintaining correct fit geometry across the full size run.