PBR Textures for Footwear: Leather, Suede and Rubber Materials in 3D
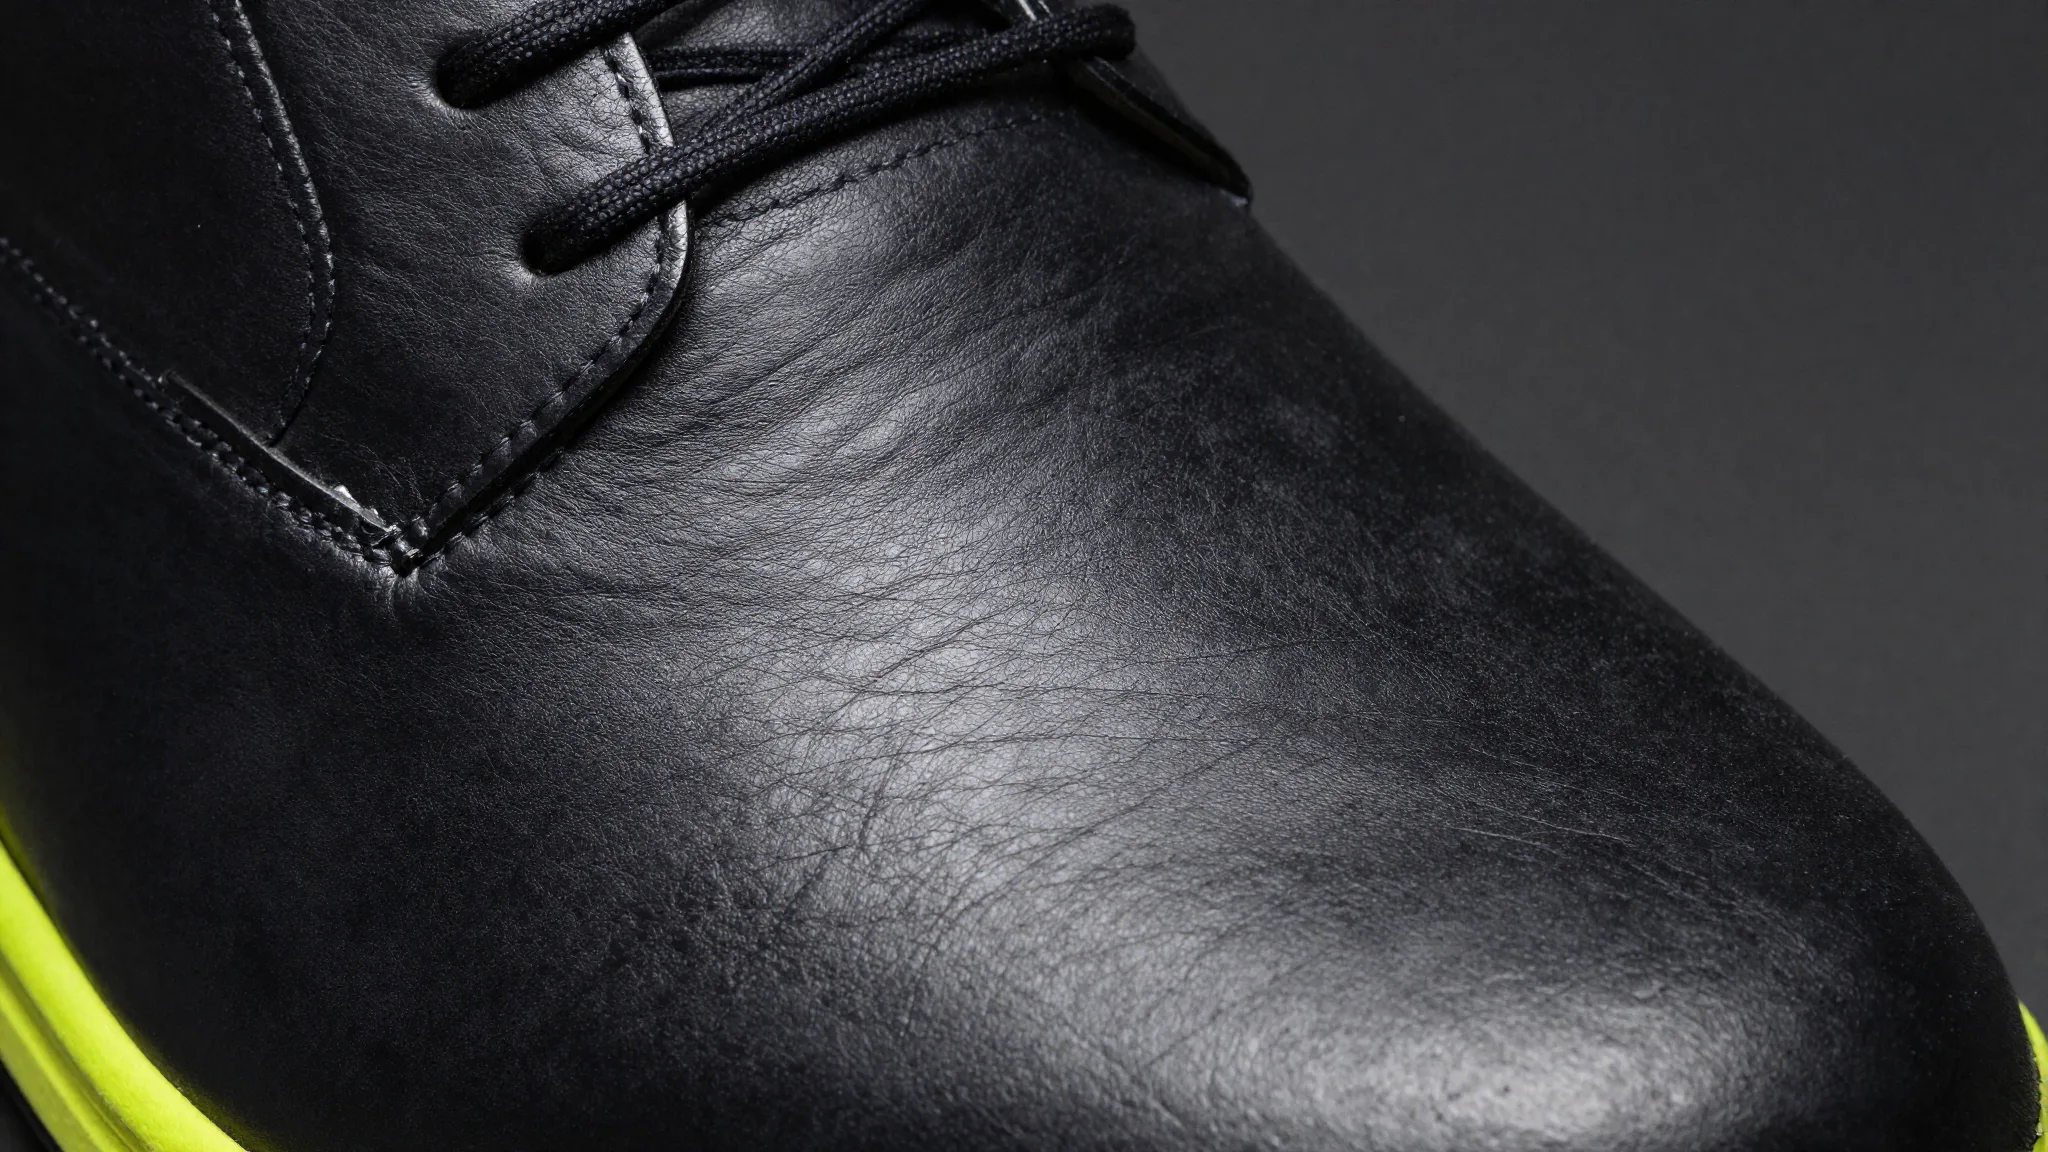
The keyword "PBR textures footwear" dominates asset-download repositories. Search it and you find free texture packs, marketplace listings, Sketchfab models. What you don't find is someone who actually makes shoes explaining what these maps do and why the roughness value on a suede upper should be completely different from the one on a rubber outsole.
That gap is exactly what this guide fills.
I'm Susanna Zampieri, an official Icad Universe trainer with over ten years in the footwear industry and 50+ luxury brands served. I work with Physically Based Rendering every day, both in production and in teaching. The guide below covers PBR from the material-science logic behind each map, through the Adobe Substance 3D authoring pipeline, to the one-click application workflow inside Icad Universe.
If you're newer to 3D footwear design and want the broader context first, start with how to become a 3D footwear designer before diving into materials.
Key Takeaways
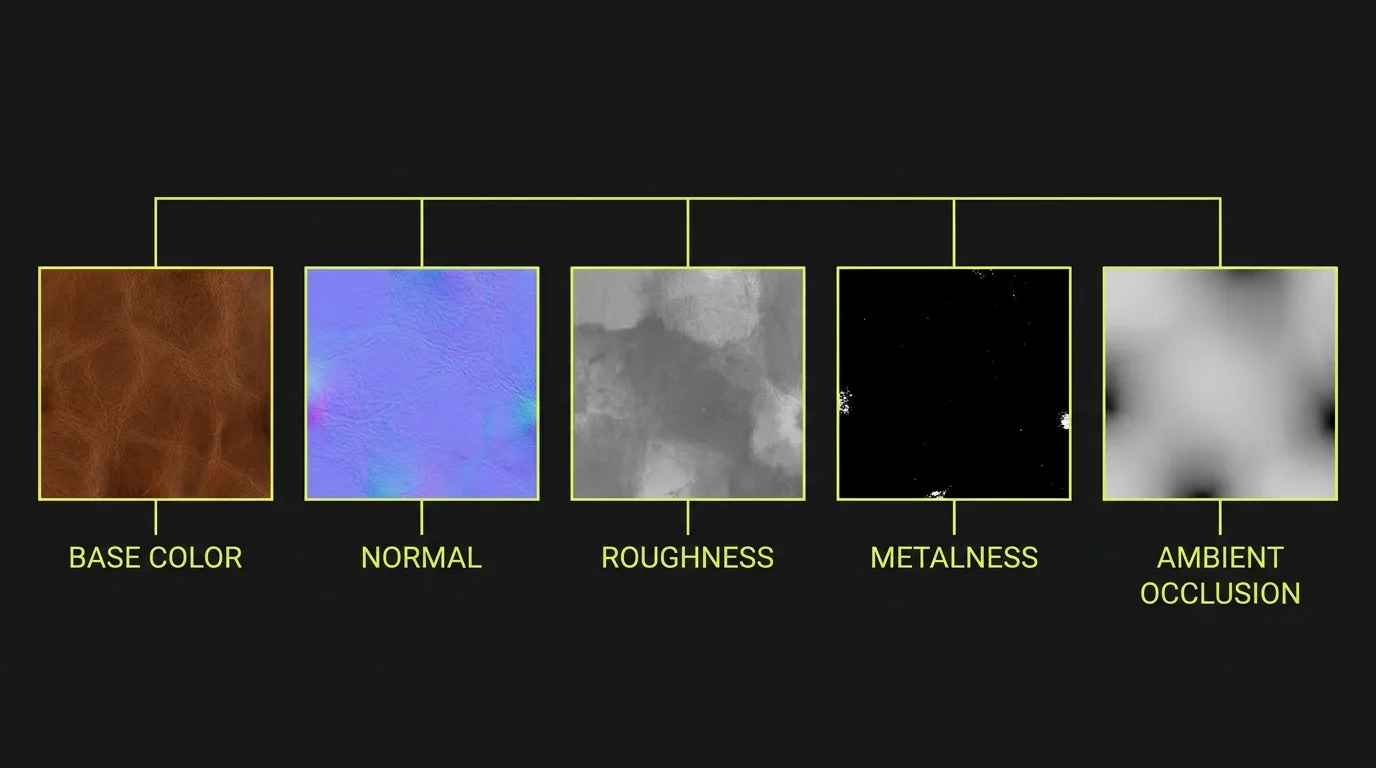
- PBR materials use five core maps: albedo, normal map, roughness, metalness, and ambient occlusion
- Roughness is the single parameter that most changes how a material reads - calibrate it first
- Leather sits around 0.3-0.45 roughness; suede at 0.75-0.90; rubber outsole at 0.55-0.70
- Companies using Adobe Substance 3D workflows see a 90% reduction in hours vs. physical photoshoots (Adobe/Pfeiffer Report, 2023)
- Icad Universe (by INESCOP) supports all five maps with native access to the Adobe Substance 3D Assets library
What Is PBR and Why Does It Matter for Shoe Design?
PBR (Physically Based Rendering) describes materials that follow real-world lighting physics, so they look consistent across any lighting context. According to Adobe and the Pfeiffer Report (2023), companies adopting Substance 3D workflows reduce hours and resources by 90% compared to traditional physical photoshoots. For footwear, that matters because shoes are photographed in neutral lightboxes, HDRI studio environments, lifestyle shoots, and real-time configurators - all in the same season.
A PBR material holds up across every one of those contexts without manual adjustment. The older approach, tuning a "reflectance" slider by eye, worked under one lighting setup and fell apart under another. PBR resolves that because each map controls a specific, physically meaningful property rather than a visual approximation.
The math behind PBR also means that the same material file you author in Adobe Substance 3D Painter behaves identically when exported to Icad Universe, a game engine, or a web configurator. You build once and deploy everywhere. That cross-environment consistency is why brands including HUGO BOSS, Louis Vuitton, Burberry, and H&M have adopted Substance 3D workflows (Adobe, 2023).
What Are the Five Core PBR Maps?
Substance 3D Painter's standard Metal/Roughness PBR workflow produces five core texture channels per material: Base Color, Roughness, Metallic, Normal, and Ambient Occlusion, with an optional Height channel for heavier surface relief (Adobe, Substance 3D Painter official documentation). Understanding what each map controls lets you create credible custom materials or modify presets intelligently, rather than turning sliders at random.
Base Color (Albedo)
The albedo map carries the surface color without any lighting information. No highlights, no shadows, no reflections. This is the most common mistake beginners make: feeding a photograph of a leather swatch directly into the albedo channel. The photo already contains shadows and gloss from the moment it was taken. Those values add to the renderer's own light calculations and produce an unnatural, muddied result.
For footwear, the albedo should be the material's neutral, even tone: the warm beige of a natural box calf, the flat grey of a tech mesh, the near-black of a rubber outsole. Think of it as the color the material would have if you placed it in perfectly even white light.
Normal Map
The normal map simulates surface relief without modifying the underlying geometry. On a leather shoe, a good normal map makes the grain feel present: the micro-pores, the direction of the hide, the subtle ridge of a seam. In Icad Universe, the normal map is critical for embossed leathers, woven textiles, and outsoles with pattern geometry.
One technical note that trips up people coming from photography or graphic design: normal maps must be kept in linear color space, not sRGB. Applying an sRGB color profile to a normal map shifts the channel values and produces incorrect surface angles. Check this before export.
Roughness
Roughness controls how smooth or microscopically rough a surface is, running from 0.0 (a perfect mirror) to 1.0 (fully matte and diffuse) (Autodesk 3ds Max 2024 documentation). It's the map that changes a material's perceived identity more than any other. A roughness shift from 0.35 to 0.85 transforms the same leather geometry from polished box calf to matte suede.
We teach students to calibrate roughness before touching anything else. Get that right and 80% of the material reads correctly. Then refine albedo and normal from there.
Metalness
Metalness is a binary float: 0.0 for dielectric materials, 1.0 for metals, with only pure black or pure white having strict physical meaning (Autodesk 3ds Max 2024 documentation). For footwear, this is straightforward. Leather, suede, rubber, canvas, mesh: all sit at 0.0. The metalness channel becomes relevant only for hardware, such as buckles, D-rings, rivets, and eyelets.
A chrome buckle gets metalness 1.0 and roughness near 0.05. A brushed brass buckle gets metalness 1.0 and roughness around 0.35, with a warm amber tint in the albedo. Everything else on the shoe stays at metalness 0.
Ambient Occlusion (AO)
The AO map encodes how exposed each surface point is to ambient light. Recessed areas (the inside of a stitch, the crease of a welt, the corner where an overlay meets the vamp) appear darker because they receive less indirect light. This map doesn't affect direct lighting; it deepens the shadow in cavities and makes construction details read more convincingly.
On a shoe with complex stitching or brogue perforations, a well-baked AO map is what makes those details feel three-dimensional rather than painted on.
What Roughness Values Should Footwear Materials Use?
Roughness is where footwear-specific material knowledge separates a realistic render from a generic one. The values below reflect physically based rendering conventions for common footwear surfaces, derived from the Metal/Roughness PBR model documented in Autodesk's 3ds Max 2024 specifications.
| Material | Roughness Range | Metalness | Visual Character |
|---|---|---|---|
| Full-grain leather (polished) | 0.30 - 0.45 | 0.0 | Tight specular highlight, visible grain |
| Patent leather | 0.05 - 0.15 | 0.0 | Mirror-like reflections, almost no diffusion |
| Nubuck / Suede | 0.75 - 0.90 | 0.0 | Broad, soft sheen, no clear highlight |
| Rubber outsole | 0.55 - 0.70 | 0.0 | Diffuse, slightly glossy under direct light |
| Mesh / technical fabric | 0.65 - 0.80 | 0.0 | Flat, fibrous light scattering |
| Chrome hardware | 0.05 - 0.10 | 1.0 | Sharp, directional reflections |
| Brushed brass hardware | 0.30 - 0.40 | 1.0 | Soft directional sheen, warm tone |
The physical reasoning behind these numbers is what makes them stable. Suede's high roughness exists because the napping process creates thousands of tiny fiber ends that scatter light in every direction. Smooth full-grain leather has a tighter specular because the surface is more ordered at the microscopic level. Understanding that logic helps you calibrate a new or unusual material without needing a reference preset: observe how the real material scatters light, then match that behavior with roughness.
This is also why using a generic "leather" texture downloaded from a repository can fail: a single roughness value doesn't distinguish between box calf and nubuck. Those two materials look nothing alike in reality, and they shouldn't look alike in your render either.
How Does Adobe Substance 3D Fit Into the Footwear Workflow?
Adobe Substance 3D sits between physical reference and your CAD software. It's where PBR materials are authored, refined, and packaged into the five-channel map set that tools like Icad Universe consume. The Adobe Substance 3D Assets library now contains more than 15,000 customizable materials, objects, and lights (Adobe, 2023), including hundreds of leather, textile, and rubber variants.
Substance 3D Sampler: From Photograph to PBR Set
Substance 3D Sampler's Image to Material feature converts a single photograph into a full PBR material set: base color, normal map, roughness, metalness, height, and AO (Adobe Experience League, official documentation). For footwear designers, this means you can photograph an actual leather swatch from a tannery, run it through Sampler, and have a production-ready PBR material in minutes.
The workflow is direct. Photograph the swatch on a neutral grey card under diffuse lighting. Import into Substance 3D Sampler and run Image to Material. The algorithm separates lighting from albedo, infers normal map data from texture variation, and estimates roughness from surface sheen. You review and adjust the output maps, then export to your target channel format.
Substance 3D Painter: Smart Materials and Layering
Substance 3D Painter is where you apply and blend materials on a 3D shoe model. Smart Materials are pre-built layer stacks that handle realistic wear, edge highlights, stitching dirt, and material transitions automatically. They save significant time on complex footwear constructions where you're managing an upper, lining, welt, outsole, toe cap, and hardware in a single file.
The practical footwear workflow looks like this:
- Photograph or source the physical material reference
- Run through Substance 3D Sampler to generate the base PBR set
- Refine and layer in Substance 3D Painter (add wear, stitching AO, color variation)
- Export the five-channel map set (Base Color, Normal, Roughness, Metalness, AO)
- Apply to the 3D shoe model in Icad Universe
For a full comparison of which software handles which part of the footwear design pipeline, the best software for shoe design comparison breaks down the tool landscape including Substance, Rhino, and Icad Universe.
How Do You Apply PBR Materials in Icad Universe?
Icad Universe, developed by INESCOP (the Spanish footwear technology institute), supports all five PBR map channels and ships with native integration to the Adobe Substance 3D Assets library. The application workflow is faster than in general-purpose 3D tools because the material system is built specifically for footwear construction logic: upper components, linings, welts, outsoles, and accessories are all discrete assignable objects.
For more detail on what Icad Universe is and how it's structured, see what is Icad Universe.
Step-by-Step Application
1. Access the Materials panel. In the side panel, open the Materials library. Presets show previews on a sphere or curved plane, which gives you an immediate read on how the material handles directional light. Browse by material category.
2. Select or create a material. Start from a preset that's close to your target. Duplicating an existing material and modifying it is almost always faster than building from scratch. Double-clicking a material opens the full edit panel with all five PBR channels accessible.
3. Assign to a component. With the material selected, click directly on the 3D piece you want to assign it to: a toe cap panel, a welt strip, a heel counter. The material is applied immediately with a real-time preview in the workspace.
4. Verify from multiple angles. Rotate the model and watch how the material responds to light from different directions. Roughness is particularly easy to misread in a flat frontal view. Side angles and rim-light views reveal whether the specular behavior matches the real material.
5. Run a quick render preview. The real-time workspace uses a simplified lighting calculation. Before your final render, run the quick render preview to verify materials under the full PBR calculation. This is where you catch roughness values that looked fine in the workspace but read as too shiny or too flat under accurate lighting.
Importing Custom PBR Maps
If you've authored materials in Substance 3D Painter, you can import the exported map files directly into Icad Universe. Assign each image file to its corresponding channel in the material edit panel: base color to albedo, normal map to normal, and so on. The one consistent error to watch for: normal maps must be in linear color space before import. An sRGB normal map produces subtle but visible artifacts in surface shading, especially on smooth leathers where the grain direction is prominent.
Managing Color Variants Across a Season
One practical feature that changes how you manage material work in Icad Universe is the color variant system. In the Designs area, you can create multiple colorways of the same model, changing materials on individual components per variant, then batch-render all variants in a single operation.
The method:
- Build and save the first colorway with all materials assigned
- Duplicate it as a new variant
- Modify only the components that change (typically the upper material and color)
- Keep the outsole, lining, and hardware materials unchanged
- Repeat for each colorway
- Launch batch rendering for all variants
For a buyer presentation requiring 6-8 colorways of the same construction, this approach compresses hours of manual re-rendering into one background process. The same PBR maps work across all variants; you're only swapping albedo values and roughness where the material type changes between colorways.
For context on how materials fit into the full modeling sequence, the neighboring tutorials cover shoe upper modeling and sole and heel design as the stages immediately before material application. After materials, the next step is photorealistic shoe rendering.
Best Practices for Realistic Footwear Materials
We've gathered these from watching hundreds of students work through material calibration in real production contexts.
Calibrate roughness first, always. Among all five channels, roughness produces the most immediate perceptual change. A correct roughness value makes the material recognizable even before you add the normal map. Start there.
Evaluate materials under a realistic lighting scene. The default workspace lighting in most software is flat and forgiving. A material that looks fine under default lighting can appear completely wrong under an HDRI studio environment. Always evaluate on your actual delivery lighting setup before finalizing.
Use "extreme" variants to find the range. When calibrating a new material, create one version with roughness pushed to maximum and one pushed to minimum. This reveals the full range the material can occupy and helps you identify the correct middle value faster than iterating from a single starting point.
Maintain specular consistency across components. A shoe reads as a single object to a buyer, even though it's built from dozens of separate components. A vamp panel with roughness 0.40 and a quarter panel with roughness 0.55 will look inconsistent on the same shoe, even if both materials are "leather." Match roughness values deliberately across components that should read as the same material type.
Check seams and overlays with AO. The ambient occlusion map is your best tool for making construction details feel three-dimensional. Make sure your AO bake includes the stitching depressions, overlay edges, and welt seam. Without it, these details appear painted rather than built.
FAQ
Can I import PBR textures made in Substance Painter or Photoshop into Icad Universe?
Yes. Icad Universe accepts standard image file formats for all five PBR channels. Assign each exported map to the correct channel in the material edit panel. The critical technical requirement: normal maps must be in linear color space, not sRGB. Importing an sRGB-encoded normal map produces incorrect surface shading, particularly visible on smooth leathers.
How many different materials can I assign to a single shoe?
There's no fixed limit. Each component of the model (vamp panel, quarter, toe cap, welt, outsole, lining, each hardware piece) accepts an independent material assignment. A women's shoe with two-tone construction and metal hardware can easily require 10-14 distinct material assignments. The Materials library keeps these organized and accessible without file bloat.
Does the roughness value I set in Substance Painter carry over correctly to Icad Universe?
Yes, when both tools use the Metal/Roughness PBR model, the roughness channel is a direct 0.0-1.0 float value. A roughness value of 0.40 exported from Substance Painter and imported into Icad Universe represents the same surface behavior. Differences in final appearance come from lighting differences between the two environments, not from channel conversion.
What's the difference between a normal map and a height map for footwear?
A normal map simulates micro-surface relief through lighting tricks without modifying geometry, which keeps files light and renders fast. A height map (or displacement map) actually deforms the geometry during rendering. For most footwear materials, normal maps handle grain, weave, and stitching detail well enough. Height maps are worth adding only for deep surface patterns like crocodile embossing or heavily textured rubber outsoles where the relief depth is significant.
Where in the design sequence do materials come in?
Materials are applied after the geometry is complete. The standard Icad Universe production sequence runs: shoe last modeling, upper construction, pattern flattening, sole and heel design, then materials and textures (this guide), then photorealistic rendering. Don't work on materials until the geometry is stable: UV maps and AO bakes depend on final surface topology.
Take the Full Course
PBR materials are one of the highest-leverage skills in 3D footwear design. Roughness, normal, and albedo control the vast majority of how a rendered shoe reads to a buyer. Getting those three channels right lifts even a solid model from "looks like a 3D render" to "looks like a product photograph."
The next step after materials is rendering itself: lighting, environment, camera angles, and post-production. See the photorealistic shoe rendering tutorial to complete the workflow.
If you want to learn PBR materials, Icad Universe modeling, and the full footwear design pipeline through structured hands-on exercises on real shoe models, the course by Susanna Zampieri covers every stage from last modeling through to final render. Explore the 3D footwear design course.