Shoe Pattern Making: How Footwear Patterns Are Made
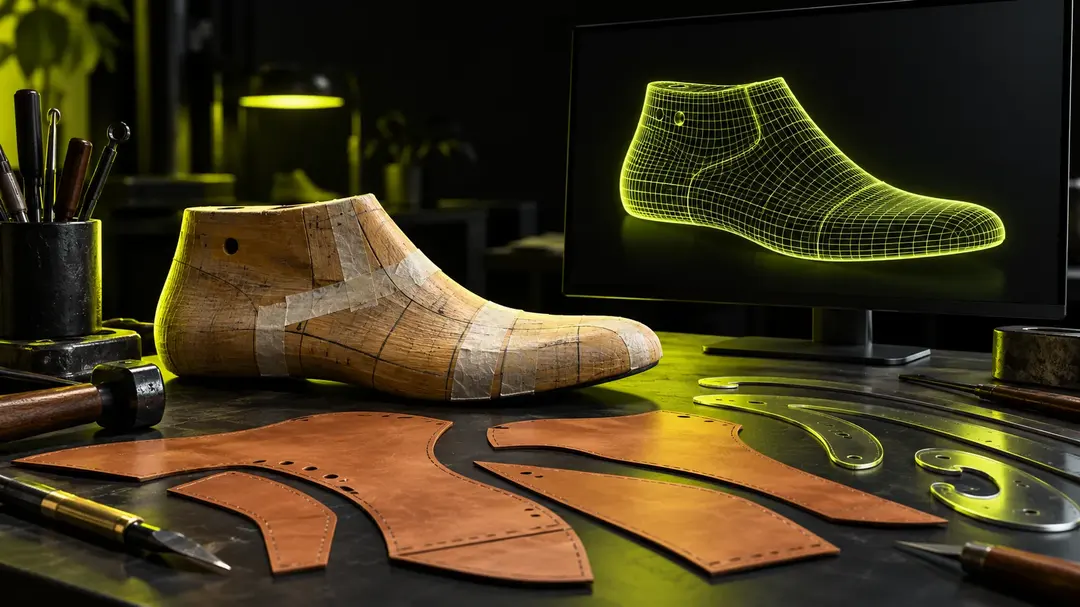
Most people picture a shoe pattern as a few paper shapes you trace and cut. In practice, a structured shoe can need thirty or more pieces, each one cut with great precision, and every one of them has to wrap around a three-dimensional last without wrinkling.
That is what makes footwear pattern making different from garment patterns. Fabric drapes and forgives. Leather on a last does not. This guide explains how a shoe pattern is made the way a professional pattern-maker works: from the last, through the design lines, to allowances, grading and the move from paper to 3D CAD.
Key Takeaways
- A shoe pattern is the set of flat pieces that, once cut and stitched, form the upper, lining and reinforcements of one shoe.
- Every pattern starts from the last: you tape its surface, draw on it, and flatten that shell into a base.
- Allowances (lasting, seam, fold, overlap) turn a drawing into something a factory can cut and stitch.
- Grading scales one master pattern across sizes, but the shape does not scale linearly.
- 3D CAD flattening replaces much of the manual taping and checks the result digitally before any leather is cut.
What Is a Shoe Pattern?
A shoe pattern is the set of flat, numbered templates that define every piece of a shoe upper, lining and reinforcement, so that the pieces can be cut from material and stitched into the three-dimensional shape of the last.
The pattern is not the design. The design is the idea: where the seams go, how high the collar sits, what the toe cap looks like. The pattern is the engineering translation of that idea into measurable pieces. The same drawing in the hands of two pattern-makers can give two different fits, which is why pattern making exists as a trade.
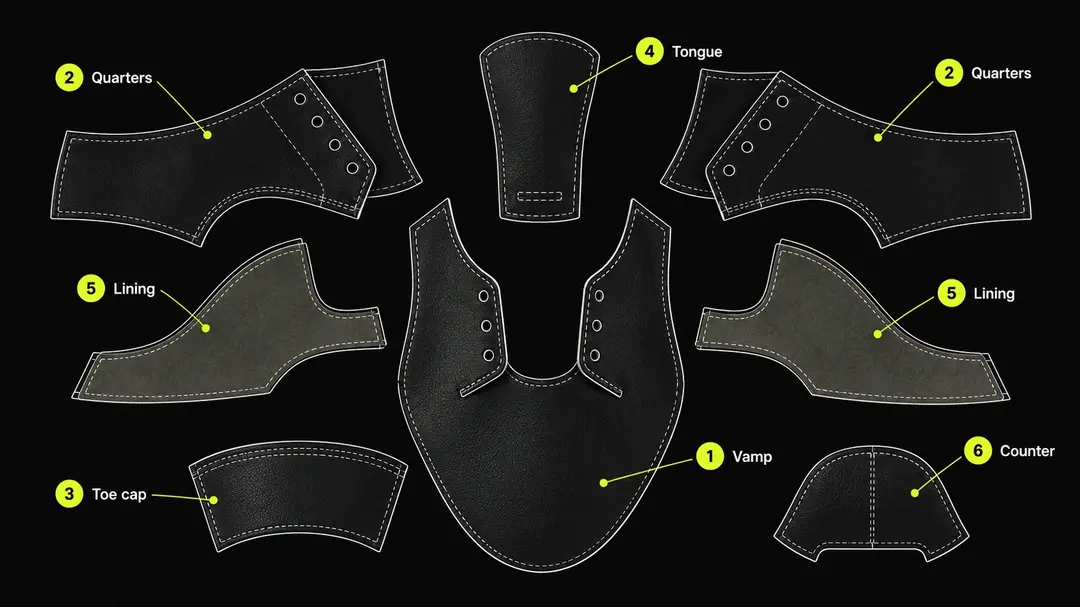
If you are unsure what the pieces are called, the parts of a shoe maps the vocabulary. Patterns follow those parts almost one to one: vamp, quarter, tongue, counter pocket, collar and so on.
Why Does a Shoe Pattern Start From the Last?
A shoe pattern starts from the last because the last defines the exact 3D surface the upper must cover. Change the last, even slightly, and the same flat pattern will fit differently. The pattern is always built for one specific last, not for a generic foot.
If the last is new to you, what a shoe last is covers the basics. For pattern making, what matters is that the last gives you three things: a shape to wrap, a bottom plane to define the lasting margin, and the heel pitch and toe spring that decide how the upper will sit.
The standard form, or shell
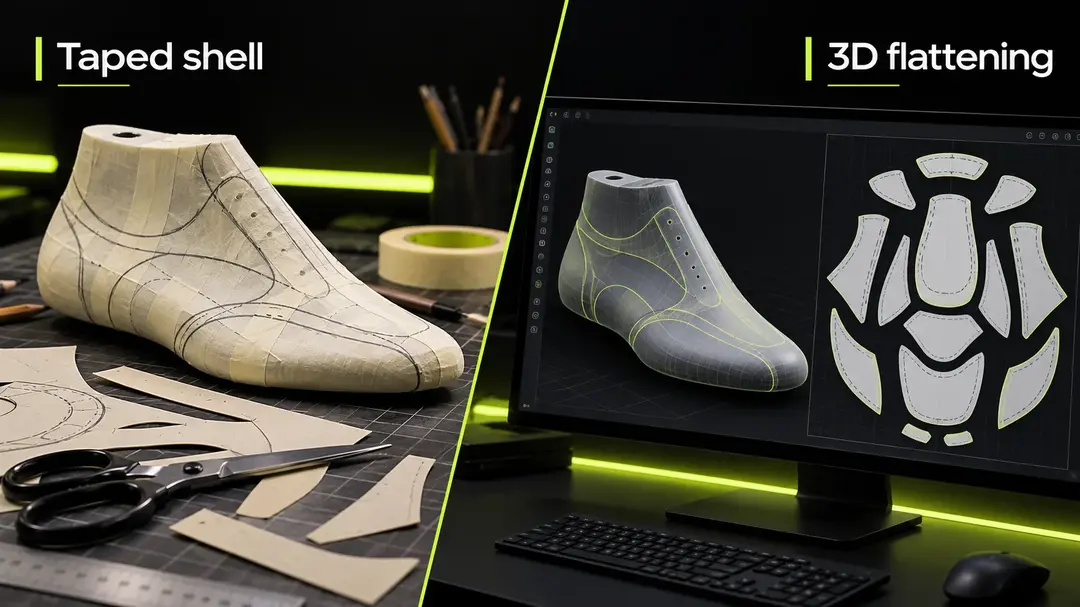
In the studio, the first step is creating what many workshops call the standard form, mean form or shell (in Italian, forma media). You cover the last with masking tape, then a second layer, until the surface is fully protected and smooth.
You then draw the outline of the footbed edge and the centre line, front and back. Everything you draw next is positioned relative to those lines. Skip this and your design lines will drift, and you won't know why until the sample comes back.
Why the shell matters
The shell is a skin you can remove. Once the design lines are drawn on it, you slit it at the back or along a seam line and press it flat. It will not lie perfectly flat, because a curved surface cannot become a plane without distortion. Dealing with that distortion is most of the craft.
How Are Design Lines Drawn on the Last?
Design lines are drawn directly on the taped shell, and they mark every seam, edge and opening of the future upper. The pattern-maker positions them for proportion and function at the same time, so the line that looks right on the side view must also behave once the shoe is worn.
You mark the throat line, the topline, the toe cap edge, the quarter seam, the heel seat position. Each line has a job. The topline controls comfort at the ankle bone. The throat line decides how far the shoe opens. A seam that crosses the widest part of the foot will put stress where the foot flexes.
A few habits I teach from my own studio work:
- Draw on both sides of the last. The medial and lateral profiles are never identical in a good design.
- Check lines from the front, back and top as well as the side. A line that looks straight in profile can curve badly seen from above.
- Mark balance points and notches now, not later. They become the registration marks that help the stitcher match pieces.
What Are the Different Sets of Pattern Pieces?
A complete shoe pattern is usually split into three groups: upper pieces (the visible cut parts), lining pieces, and reinforcements. Each group has its own material, thickness and allowances, so each is developed and labeled separately before the pieces are combined into a single numbered set.
| Pattern set | What it includes | Typical material | Main concern |
|---|---|---|---|
| Upper (cut pieces) | Vamp, quarters, toe cap, tongue, collar, straps | Leather, textile, synthetic | Appearance, seam position |
| Lining | Lining vamp, quarter lining, tongue lining, sock | Thin leather, textile | Comfort, matching the upper |
| Reinforcements | Toe puff, counter, stay tape, interlining, foam | Thermoplastic, board, tape, foam | Structure, shape retention |
Lining pieces are usually slightly smaller or differently shaped than the upper pieces they sit behind, because they pass through different seams and don't carry the same overlaps. Reinforcements are often hidden, but they decide whether a shoe holds its shape after a month of wear or collapses at the heel.
Each piece gets a name, a number, a quantity per pair, a material assignment and a grain direction. That list is a core part of the shoe tech pack, which is the document the factory builds from.
What Allowances Does a Shoe Pattern Need?
A pattern without allowances is just a drawing. Allowances are the extra material added beyond the finished edge so that pieces can be stitched, folded and pulled around the last. The main ones are the lasting allowance, seam allowance, fold allowance and overlap, and each depends on the construction.
Lasting allowance
This is the margin of upper material that extends under the last, so it can be pulled over and attached to the insole or board. Values vary with construction, material thickness and factory preference, and commonly sit in the range of roughly a centimetre to a centimetre and a half. Use your factory's figure, not a number from a blog post. To see what happens to that margin on the production floor, read about shoe lasting.
Seam allowance
The strip beyond the stitch line that keeps two pieces joined. Too narrow and the stitch tears out. Too wide and you add bulk at every join, which shows through thin leather and makes the shoe stiff.
Fold allowance
Where an edge folds back on itself, you need extra material for the fold, and you need to account for the thickness of the material at the bend. Skived (thinned) edges need less. Thick leather folded without skiving leaves a hard, rope-like edge.
Overlap
When one piece sits on top of another, such as a toe cap over a vamp, the lower piece must extend under the upper one. The overlap has to be generous enough to hold the stitch, but not so large that it creates a ridge you can feel through the lining.
Practitioner note: the most common error I see from students is getting the shape right and the allowances wrong. A beautiful flat piece with no fold allowance still produces a bad shoe.
How Do You Make a Shoe Pattern by Hand?
The traditional method moves from the taped shell to a flat base, then to the full pattern set. You mark and cut the shell, flatten it onto card, correct the distortion, add allowances, split it into pieces along the design lines, and test with a sample.
- Tape and mark the last. Cover the last, draw the centre line, footbed edge and design lines.
- Remove and flatten the shell. Slit it, lay it on card and press it as flat as it will go, cutting relief where needed.
- Trace and true the base. Smooth the outline, rebalance lengths on seams that must match, and square the key points.
- Split into pieces. Cut along the design lines, then rebuild each piece as its own template.
- Add allowances. Apply lasting, seam, fold and overlap values, and add notches.
- Make the first sample. Cut in real or similar material, stitch, last, and look at where it wrinkles or gaps.
- Correct and repeat. Adjust the pattern, not the sample. A fix that lives only in the sample never reaches production.
A first sample is rarely right, and several rounds are normal. An experienced pattern-maker usually sees where the distortion will appear before it does. A beginner usually finds out at the sample stage.
How Does 3D CAD Change Shoe Pattern Making?
3D CAD replaces the physical taping and flattening with a digital version of the same logic. You design directly on a 3D last model, the software flattens each surface into a 2D piece, and you check distortion on screen. It removes much of the material waste of early sample rounds.
The logic is identical to the manual method. You still need to understand lines, allowances and construction. What changes is speed and feedback: you see tension and stretch before you cut anything, and a change to a design line updates the pattern at once.
In the studio, I build the upper on the last in 3D, flatten, inspect the result, and only then output the pattern. The flattening step itself is a topic of its own, so I won't repeat it here. The full walk-through is in shoe pattern flattening from 3D to 2D, and the modelling side is in how to model a shoe upper in 3D.
| Traditional (tape and card) | 3D CAD flattening | |
|---|---|---|
| Starting point | Taped physical last | Digital last model |
| Distortion check | After the first sample | On screen, before cutting |
| Design change | Redraw and recut | Edit the line, pattern updates |
| Material use in development | High (multiple samples) | Lower (fewer physical samples) |
| Skill still required | Pattern logic, construction | The same |
Footwear CAD such as Icad Universe, developed by INESCOP in Elche, Spain, is built around this workflow. Software does not replace pattern knowledge. It speeds up the cycle for someone who already has it.
How Is a Shoe Pattern Graded Across Sizes?
Grading takes one approved master pattern and produces the other sizes of the range by shifting key points by set amounts. Because a shoe does not scale uniformly, grading changes length, width, and heights at different rates, and the grade rules are specific to the last family.
Sizing systems also differ. UK, US, EU (Paris point) and Mondopoint step in different increments, as the overview of shoe size systems shows, so confirm which one your factory uses before setting grade rules.
The master size is usually in the middle of the range, though factories differ. You grade up and down from there, and you do not build each size from scratch. There are three common traps:
- Scaling the whole pattern. A size 45 is not a size 38 enlarged. Heel height, toe spring and the topline do not scale in proportion to length.
- Ignoring the last. Grade rules should follow the actual last series, which a good last maker supplies.
- Not checking extreme sizes. The smallest and largest sizes break first. Make a physical sample of at least one extreme.
What Mistakes Do Beginners Make in Shoe Pattern Making?
The most frequent beginner mistakes are working without a real last, forgetting allowances, ignoring material behaviour and skipping sample checks. Each is avoidable at the pattern stage and expensive once it reaches production.
- Designing on a flat drawing only. A line that looks fine on paper may sit wrong on the last.
- Using the wrong last. Building a pattern on a last you won't produce on means starting again.
- Forgetting material thickness. Thick leather needs more fold allowance and different seam widths than thin leather.
- Making seams that cross flex points. The ball of the foot and the ankle bend, and a seam there will fail or rub.
- No notches or balance marks. The stitcher then guesses, and the result varies by operator.
- Changing the sample, not the pattern. Corrections must go back into the master file.
- Skipping the tech pack link. A pattern is only useful with a spec that says what material each piece uses.
Which Tools Do You Need for Shoe Pattern Making?
The tool list depends on the method. Manual work needs a handful of inexpensive items, while digital work needs footwear CAD, a computer and, ideally, access to a last you can scan or model. In both cases, the real requirement is knowing how a shoe is constructed.
Manual:
- Masking tape and a marker for the shell
- Pattern card (manila or similar) and a ruler
- Curved rulers, awl, notcher and scissors
- A last, preferably the one you will produce on
Digital:
- Footwear CAD with last import and flattening
- A 3D last model, scanned or built in 3D (see shoe last 3D modelling if you need to build one)
- A printer or plotter to output patterns, or a file export for the factory
For general references on the trade and on footwear technology, the Spanish footwear technology centre INESCOP and the UK-based research body SATRA both publish technical material.
FAQ
What is a shoe pattern?
A shoe pattern is the set of flat templates for every piece of a shoe upper, lining and reinforcement. Each template includes allowances and notches, so pieces can be cut from material and stitched into the shape of a specific last.
How do you make a shoe pattern?
You tape a last, draw the design lines on it, remove and flatten the shell, and split it into pieces. Then you add lasting, seam, fold and overlap allowances, and test the result with a sample. In 3D CAD, the flattening happens digitally from a 3D model of the last.
How many pieces are in a shoe pattern?
It depends on the design. A simple slip-on can be a handful of pieces, while a structured shoe commonly needs thirty or more once you count upper, lining and reinforcement pieces. Each piece is numbered with a quantity per pair.
What is a lasting allowance?
It is the extra margin of upper material that extends beyond the bottom edge of the last, so the upper can be pulled under and attached to the insole or board. The exact value depends on construction and material, so use your factory's specification.
Can you make a shoe pattern without a last?
Not reliably. A pattern drawn flat, without a last, will usually wrinkle or gape when stitched and lasted. The last gives the 3D surface the pattern must fit. If you don't have a physical one, a digital last model serves the same purpose in CAD.
Is shoe pattern making hard to learn?
It's learnable, but it rewards practice more than theory. The geometry is not complicated, yet judging how leather will behave on a last takes repeated samples. Starting with a simple design and working through the whole cycle once teaches more than reading several guides.
Where to Go Next
Pattern making sits at the centre of footwear development: the last comes before it, the tech pack and the factory after it. Once you have built one shoe end to end, the logic of each step becomes much clearer.
If you want to practise the 3D side of this workflow, with the last, the upper, flattening and pattern output in one pipeline, the 3D footwear design course walks through it step by step.