Vulcanized vs Cupsole Shoes: How Each Is Built and When to Use It
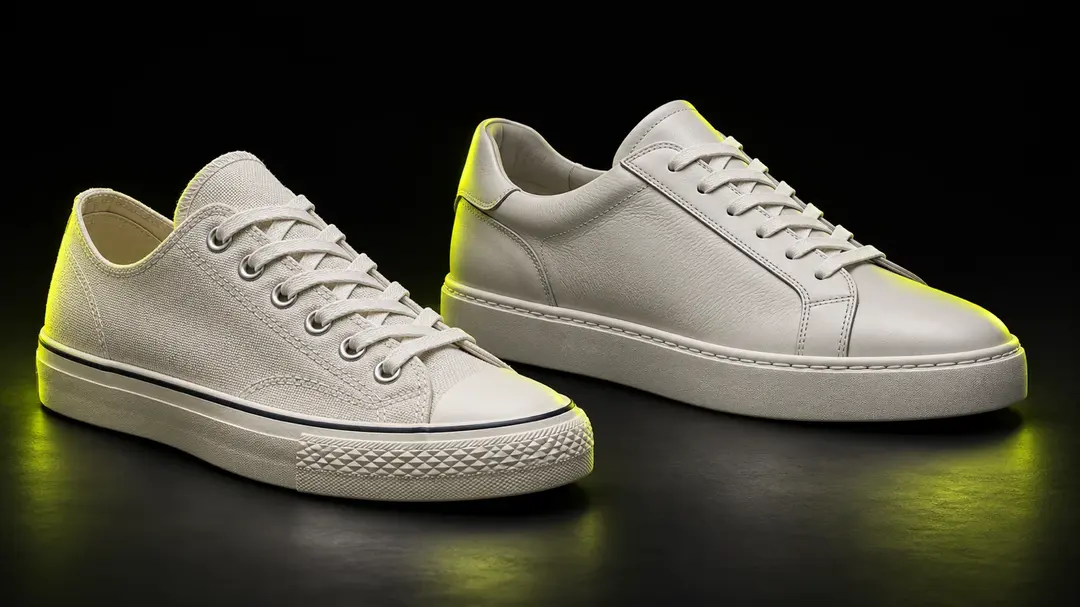
Put a classic canvas skate shoe next to a leather court sneaker and most people see two flat-soled sneakers. A designer sees two different manufacturing systems. One is baked into a single rubber-and-canvas object; the other is a finished upper attached to a pre-made sole unit.
That difference decides how the shoe feels underfoot, how it ages, what the pattern has to allow for, and what the 3D model must show. This guide explains both constructions from the studio side, then gives you a way to choose between them.
Key Takeaways
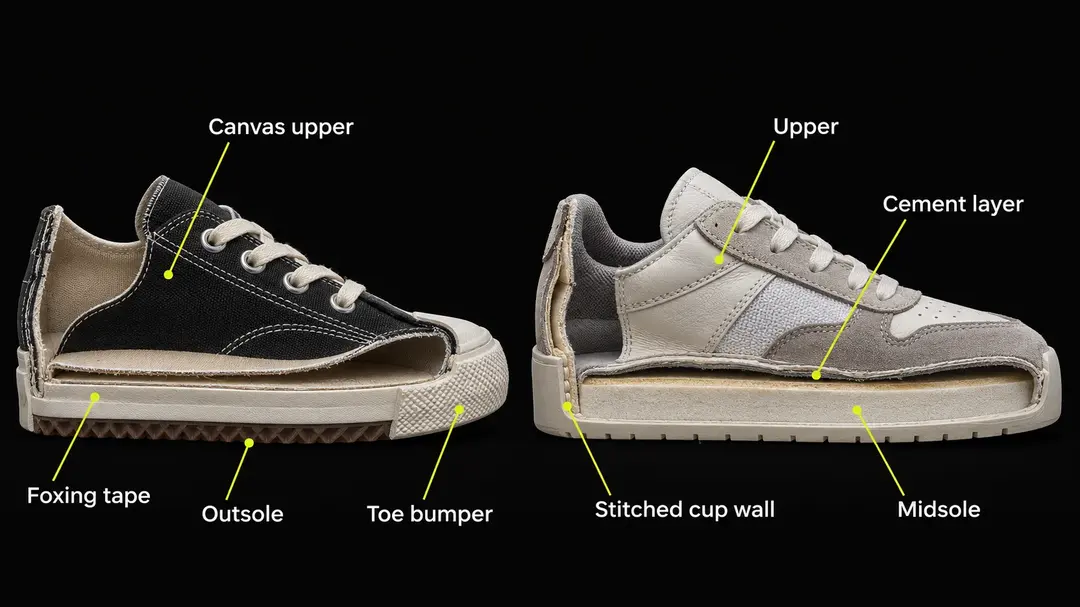
- A vulcanized shoe is assembled with uncured rubber (foxing tape and an outsole) and then cured with heat, so the rubber bonds to the upper and hardens into one unit.
- A cupsole shoe has a pre-molded rubber cup that wraps the foot's edge. The upper is cemented into it and usually stitched around the perimeter.
- Vulcanized soles give more board feel and flexibility; cupsoles give more support, cushioning room and impact protection.
- Cupsoles generally resist sole separation and wear better in heavy use, while vulcanized soles wear faster but are easier to build in simple, clean shapes.
- The choice changes the pattern: foxing allowance and slip or strobel lasting for vulcanized, a defined cup wall and stitch line for cupsole.
What Is a Vulcanized Shoe?
A vulcanized shoe is a shoe whose sole is attached by vulcanization: uncured rubber parts are applied to the lasted upper, and the whole shoe is then heated so the rubber cures (cross-links), hardens and bonds to the upper without needing a stitched sole. Vulcanization itself is the chemical hardening of rubber with sulfur and heat, a process associated with Charles Goodyear's work in the 1830s.
In footwear this gives the "vulc" look: a thin rubber sidewall wrapped around the base of a canvas or suede upper, a flat gum or patterned outsole, and a continuous rubber band (the foxing) running around the perimeter. It is the construction behind most classic canvas sneakers and a large share of skate shoes.
The relevant search terms overlap. "Vulcanized shoes", "vulc sole" and "vulcanised construction" all describe the same system. The category sits inside the wider family of shoe construction methods, alongside cemented, Blake and Goodyear welted builds.
How a Vulcanized Shoe Is Built, Step by Step
The sequence is shorter than a welted shoe but less forgiving, because the rubber must be handled before it is cured.
- Upper preparation. The upper is cut, stitched and closed. Because there is no stitched sole, it is usually closed at the bottom edge and lasted using a slip or strobel construction (more on that below).
- Lasting. The upper is pulled over the last and fixed in shape. Canvas and cotton linings are common, since they tolerate the heat that follows.
- Foxing application. A strip of uncured rubber, the foxing tape, is wrapped around the lower edge of the upper and overlaps the bottom margin. Toe caps and heel stabilizers are added as separate rubber parts.
- Outsole application. An uncured rubber outsole, often a cut or calendered sheet with the tread already pressed in, is placed on the bottom. Adhesive and a primed surface help the rubber stick before curing.
- Curing. The shoes go into an oven or autoclave and are heated for a set time. Heat and pressure cure the rubber and bond it to the upper. Exact temperatures and times vary by compound and factory, so they belong in the tech pack of the specific project rather than as a universal figure.
- Cooling and finishing. The shoes are cooled on the last, then the foxing is trimmed and cleaned, the insole is fitted and the lacing is finished.
In the studio, the part I watch most carefully is step 3. The foxing tape is not decoration. It is the structural seam between a soft upper and a rubber base, and its width and position are specified, not left to the line operator.
Why the Classic Canvas Sneaker Looks the Way It Does
The shape of the classic vulc sneaker follows from the process. A flat outsole is easiest to press and cure. A thin sidewall is enough, because the foxing is bonded rather than stitched. A toe bumper is added because the extra rubber protects the toe, which is the first area to abrade.
The visible foxing line, the rubber stripe around the shoe, is therefore a manufacturing artifact that became a design signature. You can restyle it, but you cannot remove its function without replacing the construction.
What Is a Cupsole Shoe?
A cupsole shoe is a shoe built on a pre-molded rubber or rubber-compound cup, a one-piece sole whose raised walls wrap the foot's edge, into which the finished upper is cemented and usually stitched. The cup is molded separately in a steel mold, so its wall height, texture and sole profile are fixed before the upper ever reaches the line.
The cupsole is the standard construction for many leather court shoes, basketball-derived sneakers and chunky skate shoes. The cup is often paired with a separate midsole or a cushioned footbed inside it, which is where much of the comfort comes from. For the full anatomy, see our guide to the parts of a shoe and the breakdown of types of shoe soles.
How a Cupsole Shoe Is Built, Step by Step
- Upper and last. The upper is closed and lasted, typically with a strobel board or a board-lasted bottom, so the base is a clean, flat surface.
- Cup preparation. The molded cup is surface-prepared, usually cleaned, roughened and primed, so cement will grip it.
- Cementing and pressing. Adhesive is applied to the upper and the cup. They are joined, and the assembly goes through a press so the bond is even all around.
- Stitching. On many models a stitch is run around the cup wall, through the upper and the cup. It reinforces the bond and is a recognizable visual detail.
- Finishing. Sockliner, laces, and cleaning complete the shoe.
Cupsole shoes are not cured in an oven as a final shoe. The rubber was cured earlier, when the cup was molded. This is the key difference in the factory flow.
In practice the cup is a tooling decision. A new cup needs a mold, and a mold is a significant upfront cost and lead time, so many brands reuse existing cup tooling and change only the upper. That is worth knowing before you promise a client a new sole profile.
Vulcanized vs Cupsole: Side-by-Side Comparison
The practical differences come down to how the sole is attached and how thick the sole system is. This table summarizes them for a typical sneaker. Individual models can differ, so treat it as a general guide.
| Feature | Vulcanized | Cupsole |
|---|---|---|
| Sole attachment | Uncured rubber cured onto the upper with heat | Pre-molded cup cemented to the upper, often stitched |
| Typical profile | Thin, flat, low | Thicker, with raised sidewall |
| Board feel | High; the foot feels the ground | Lower; more material between foot and ground |
| Flexibility | Flexes easily, short break-in | Stiffer at first, supports more |
| Impact protection | Limited by sole thickness | Better, room for cushioning inside the cup |
| Arch and heel support | Minimal unless added in the insole | Greater, because the cup walls cradle the foot |
| Durability | Rubber and canvas wear faster in heavy use | Generally longer-lasting, resists separation |
| Tooling cost | Lower; sheet rubber and simple parts | Higher; each cup needs a mold |
| Typical uppers | Canvas, suede, thin leather | Leather, suede, thicker uppers |
| Typical look | Clean, retro, minimal | Chunkier, structured |
Board Feel vs Protection: Which One Should You Choose?
Choose vulcanized when you want ground feel, flexibility and a low profile. Choose cupsole when you want support, impact protection and durability, especially for heavy daily wear or hard skating.
Board Feel
Skaters often prefer vulcanized shoes because the thin sole lets the foot feel the board and flex easily for flip tricks. This is why many skate brands still offer vulcanized lines alongside cupsole ones. Skaters debate this tradeoff constantly, and the right choice depends on the type of skating and how much impact the skater takes.
Protection and Durability
A cupsole spreads load across a wider, stiffer base and leaves room for cushioning. For skaters who jump stairs, or for anyone on their feet all day, that protection matters. The cup's stitched wall also helps resist the sole separation that can occur where a vulcanized foxing bond fails.
Vulcanized shoes tend to wear out at the toe and sidewall, where flexing and abrasion are highest. A toe cap and a reinforced foxing reduce this, but they add material and cost.
Which Brands and Styles Use Which
As general plain-text examples: classic canvas sneakers such as the Converse Chuck Taylor and Vans Authentic and Old Skool are vulcanized builds. Many leather skate shoes and court-style sneakers from brands such as Nike SB, adidas and DC use cupsole builds. Many brands offer both, so check the specific model rather than assuming from the brand name.
How Each Construction Changes the Upper Pattern
The construction decides how the pattern is cut, because the upper has to meet the sole in a specific way. This is where a designer or pattern-maker earns the difference. For the wider pattern workflow, see shoe pattern making and shoe lasting.
Vulcanized: Foxing Allowance and Slip or Strobel Lasting
For a vulcanized build, the pattern needs a foxing allowance: extra material at the bottom edge that sits under the foxing tape, so the bond has enough overlap to hold. The foxing line is drawn on the pattern as a defined band, not left to the factory.
Lasting is typically slip lasting or strobel lasting. In slip lasting the upper is closed like a sock, with the bottom sewn shut, and slipped onto the last. In strobel lasting a thin strobel board is stitched to the upper, which gives a flat, flexible base. Both avoid a thick lasting margin that would show through a thin vulcanized sole.
Cupsole: Wall Height and Stitch Line
For a cupsole build, the pattern must reach the cup wall cleanly. The designer specifies the cup wall height, the position of the stitch line, and the margin between the upper's lasting edge and the inside of the cup. Because the cup is already molded, the upper must be designed to fit it, not the other way around.
A cupsole upper usually has a defined lasting margin to cement against the cup. If the margin is too small, the bond is weak; too large and the margin bunches inside the cup.
What Changes in the 3D Model
In 3D, the difference shows up in the sole-to-upper junction. A vulcanized model needs the foxing band modeled as a thin wrap with a defined overlap, plus the toe bumper as a separate surface. A cupsole model needs the cup as a solid component with accurate wall height, and the stitch line is placed on the wall.
When I build these in Icad Universe, I model the sole first and fit the upper to it, because the sole's edge dictates where the upper ends. The same logic applies to 3D sole and heel design: the sole geometry is the constraint, and the upper follows it. A mistake at this junction is the most common reason a first sample does not close properly.
Common Mistakes When Choosing a Construction
The most common mistakes come from picking the look before the construction.
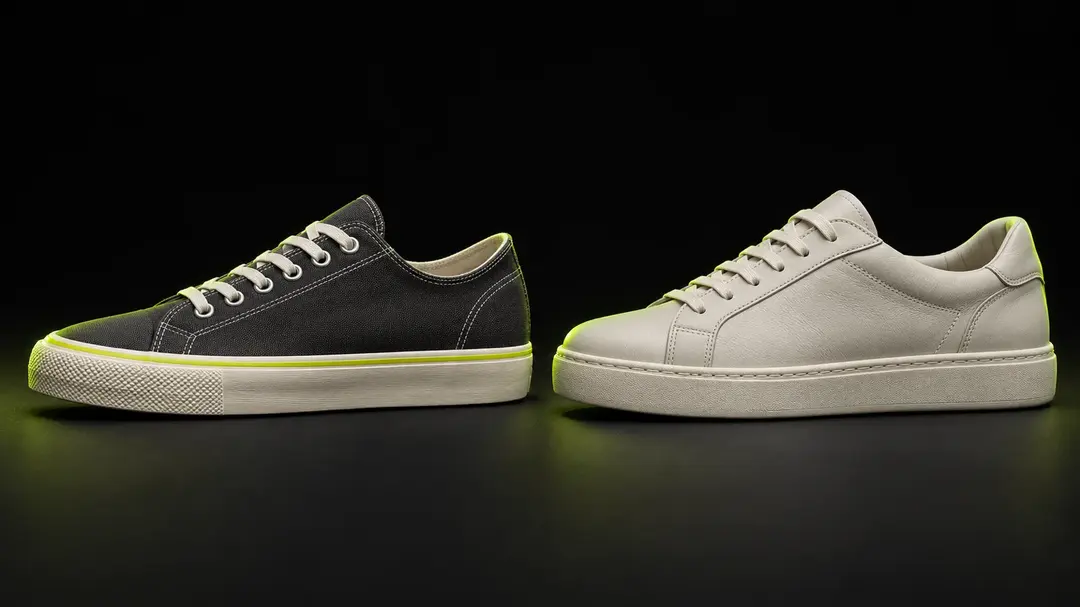
- Treating foxing as decoration. Removing or thinning it without rethinking the bond.
- Using a thick leather upper on a vulcanized build. The heat and flex requirements often suit canvas, thin suede or flexible leather better.
- Promising a new sole profile without tooling. A new cup means a new mold.
- Skipping lasting method in the spec. Slip, strobel and board lasting give different bottoms, and the factory will pick one if you do not.
These all belong in the shoe tech pack so the factory does not decide for you. For how it all fits in the full process, see how shoes are made.
FAQ
What is the main difference between vulcanized and cupsole shoes?
A vulcanized shoe is assembled with uncured rubber and cured with heat so the sole bonds to the upper. A cupsole shoe uses a pre-molded rubber cup, and the upper is cemented and often stitched into it. The first gives more board feel; the second gives more support and protection.
Are vulcanized shoes good for skateboarding?
Yes, many skaters like them for board feel and flexibility. They wear faster than cupsoles under heavy use, so the right choice depends on the type of skating and how hard the shoes are used.
Are cupsole shoes more durable?
Generally yes. The stitched, cemented cup is more resistant to sole separation, and the thicker rubber lasts longer. Durability still depends on materials and build quality, so it varies by model.
Why are vulcanized shoes cured in an oven or autoclave?
Heat cures the rubber, hardening it and bonding it to the upper. Exact temperatures and times depend on the rubber compound and the factory process.
Can I resole vulcanized or cupsole shoes?
Cupsole shoes are usually easier to repair than vulcanized ones, since the cup is a separate part that can sometimes be re-cemented. Vulcanized soles are bonded by curing, so replacement is harder and often not practical. Ask a repair shop about the specific pair.
Which is easier to design?
Vulcanized builds are simpler in tooling and shape, while cupsoles need a mold and a precise fit between the upper and the cup. Neither is easy to get right, and both need a clear spec.
Learn to Design Both Constructions in 3D
Understanding how a sole is attached is what separates a sketch from a shoe a factory can build. If you want to model the sole, fit the upper and generate the pattern in 3D, the 3D footwear design course walks through the full workflow in Icad Universe, from last to flat pattern.
Written by Susanna Zampieri, 3D footwear designer and official trainer of Icad Universe.